This article shows you how to export and restore course data (without participants) from your course. Course data can be exported and restored from any Moodle-based system. This is useful if you want to fill in courses which are repeated every year.
In comparison to Course Import, the restore function also lets you restore courses from other (foreign) Moodle systems. The exported and downloaded course data can thus also be used as a backup, for example.
Export course data[Bearbeiten | Quelltext bearbeiten]
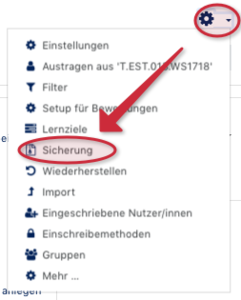
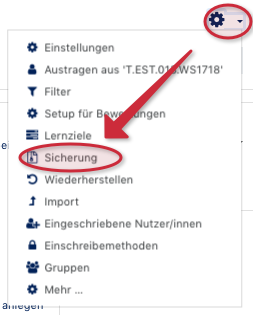
Click on Backup in the course settings.
Backup settings[Bearbeiten | Quelltext bearbeiten]
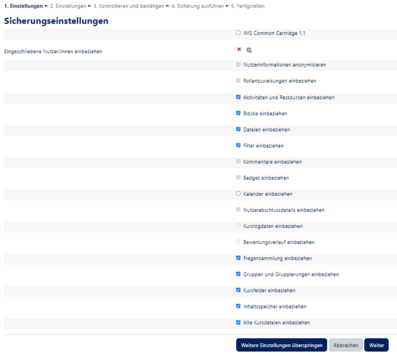
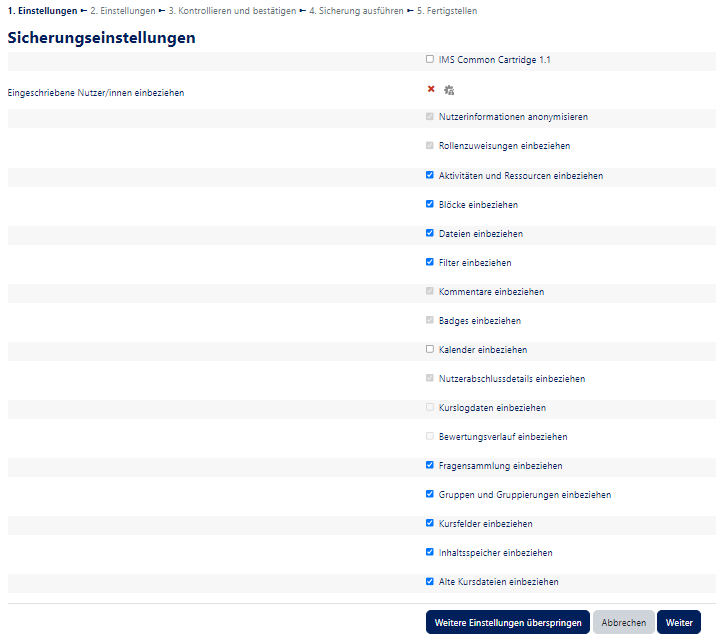
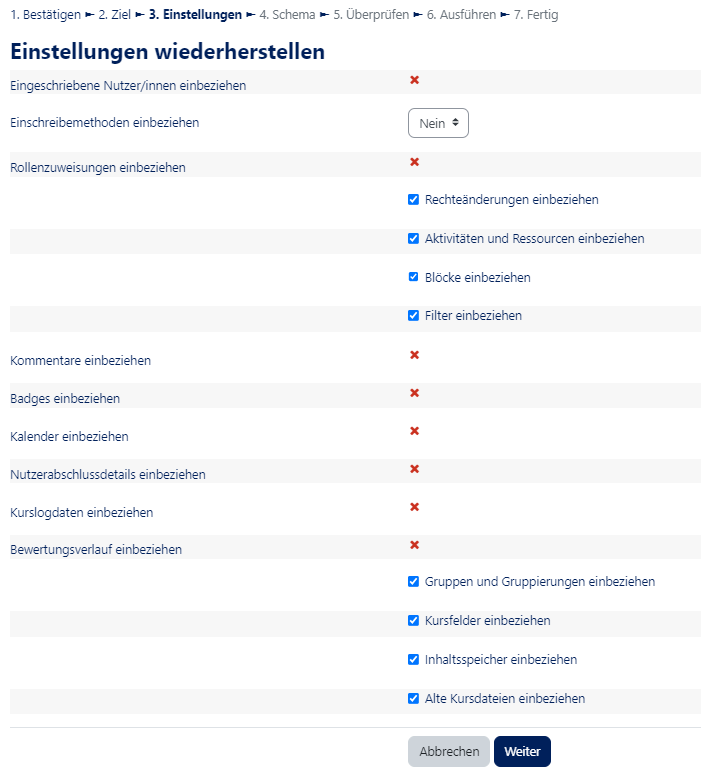
In the next dialog you select which content types will be taken from the course. Please note that the participant export or import is locked. You will find more information on this below. In the next step you then select which content is to be saved. To do so click on Next.
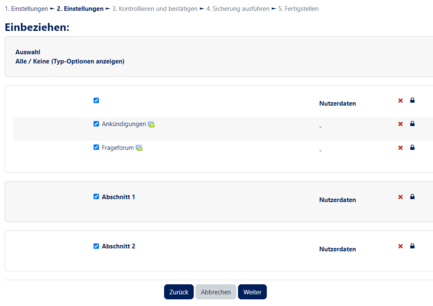
Select content
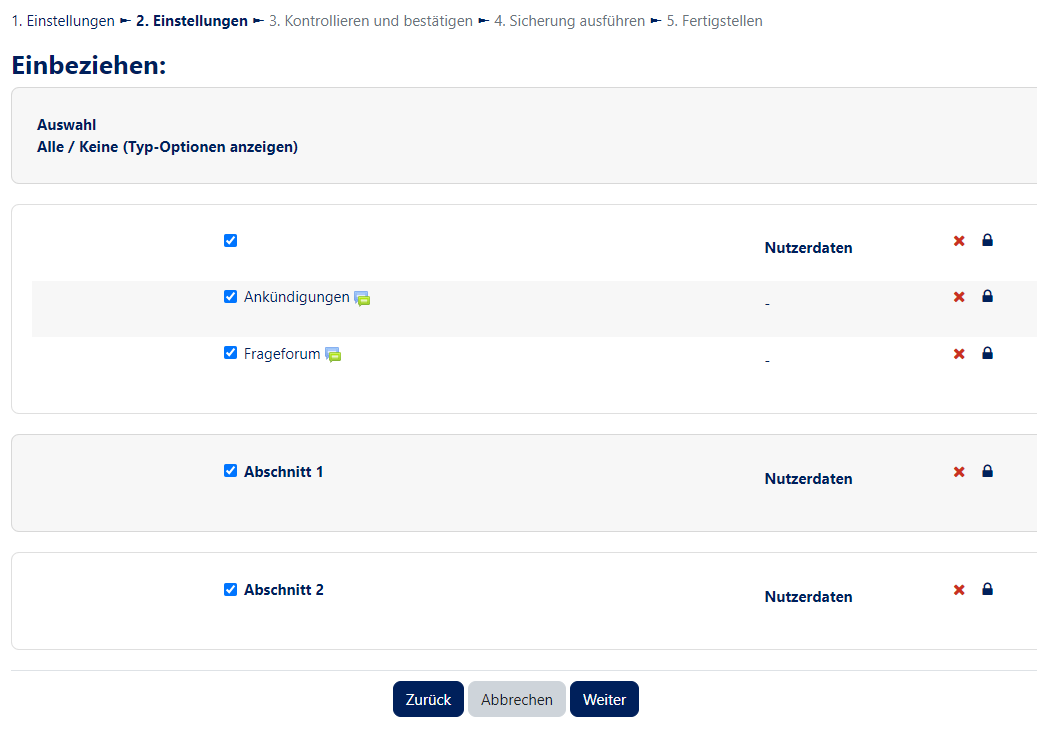
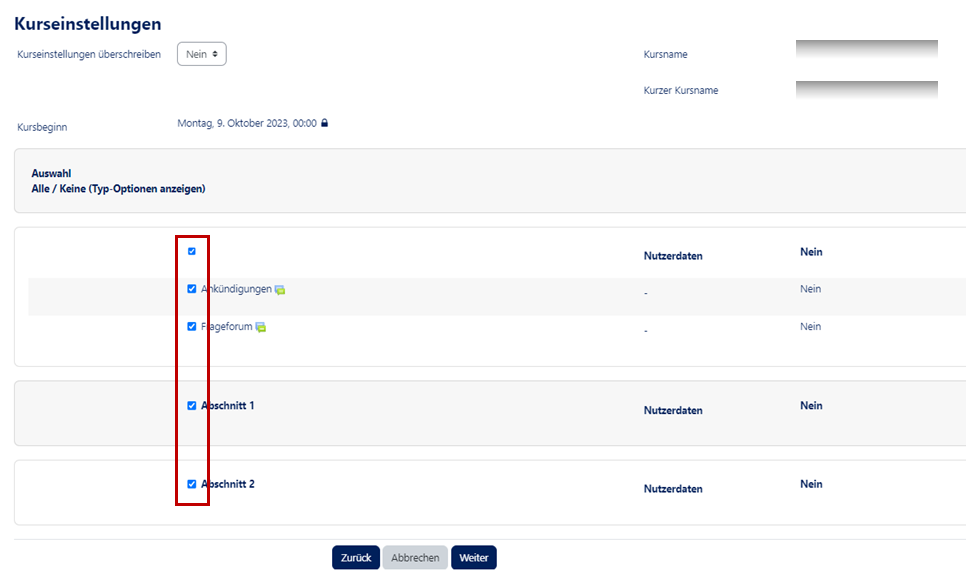
In this dialog you select all contents (materials / activities) you want to export. Here you can export only certain course topics or activities, for example. By default all materials and activities are selected, so you export the complete course. Then click on Next.
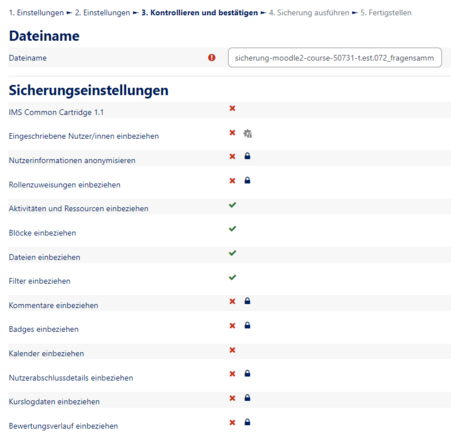
Control and export settings
Finally, an overview with all settings is displayed. If you want to change them again, click on Back. A click on "Execute backup" starts the export. A progress bar shows you how far your export has progressed.
Download exchange rate protection
- After the export, click Next. You will be redirected to the recovery overview.
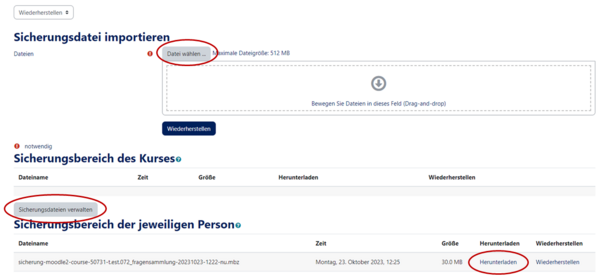
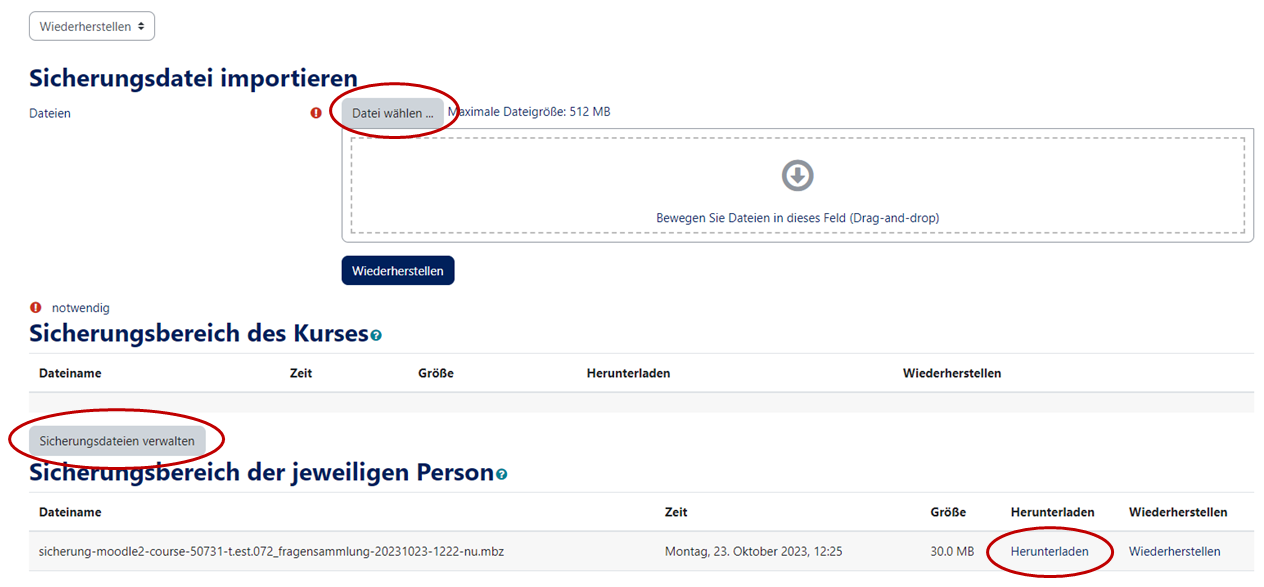
- Here you can import a backup file by clicking on "Select file". You will also find your just exported course in the User's backup area list.
- Here you can download it directly or restore it to the current course by clicking Restore. You can access the restore overview at any time via the link Restore in the course settings.
Restore course data
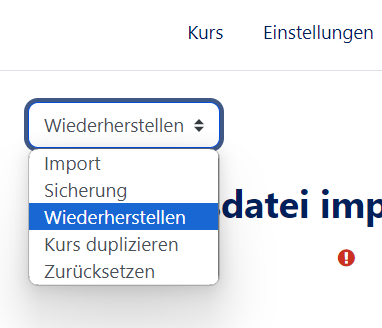
Click on Restore in the course settings:
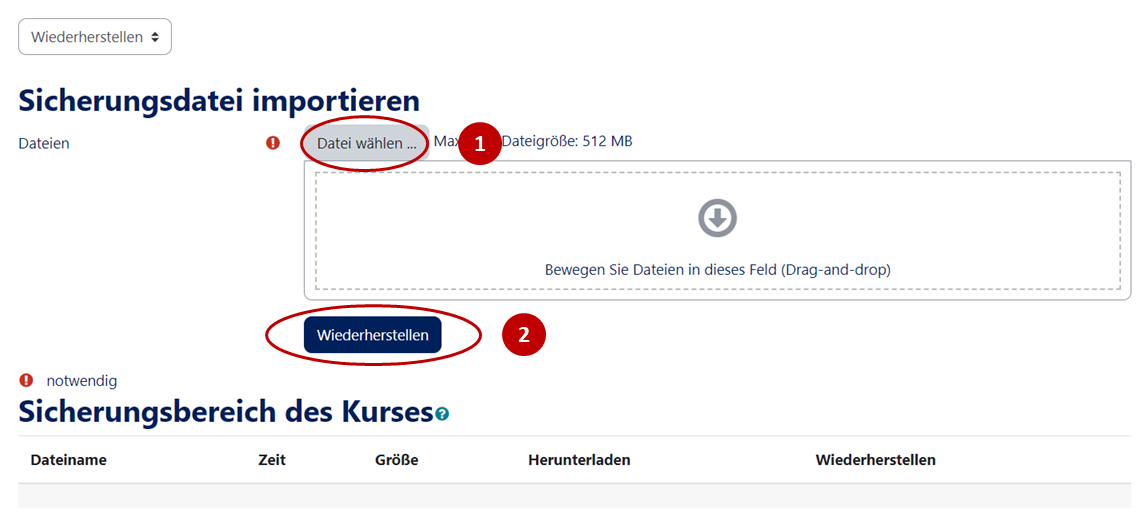
Upload course backup
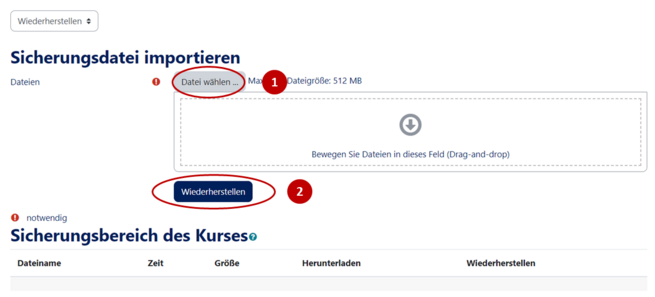
In the restore options select a file with a Moodle course backup and upload it.. Alternatively you can select a previous backup in the User's backup area and restore it directly using the Restore link. If you upload a file, click on Next afterwards.
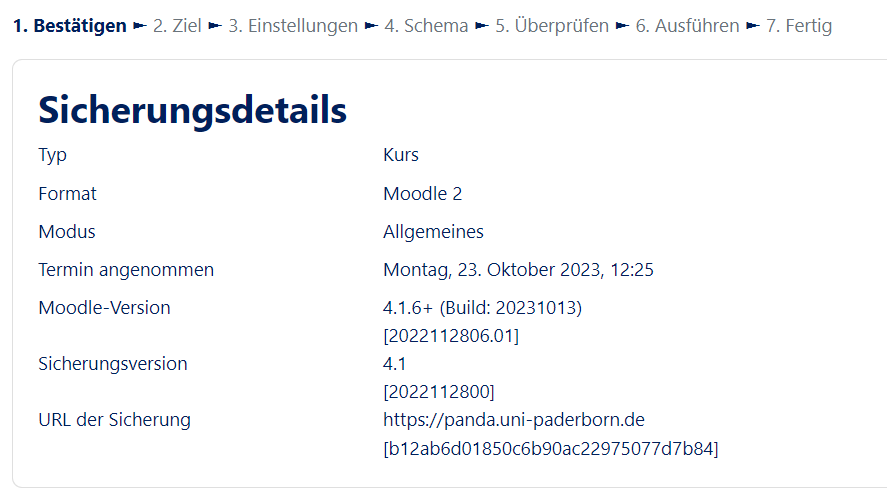
Backup details and restore selection
- After the file has been uploaded and analyzed in the browser, you will see your backup details. All information about the uploaded backup is displayed here. Here you also select the type of quote data you want to restore from the backup. Then click on Next.
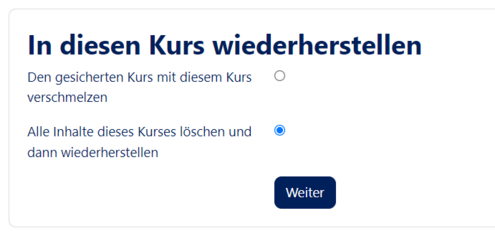
- The recovery wizard will now ask you for the destination and the way to export. You have the choice between Restore to this course or you can select a course. Since courses are created by the ZIM it is recommended to restore to the current course here. Again you have two options:
- Merge the saved course with this course: Restores the course content and adds it to topic contents of already existing topics (current topic 1 merges with old topic 1, etc.)
- Delete all content of this course and then restore it: Deletes all current course content and then restores the content from the course backup. This procedure is recommended if you want to create an exact copy of the saved course.
- Then click on Next.
Set recovery settings and scheme
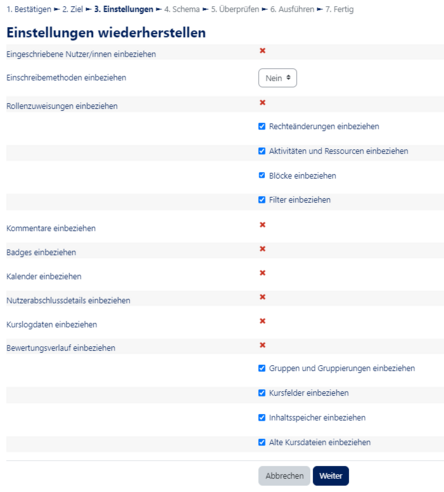
- In the recovery settings, specify what type of content you want to upload, then click Next.
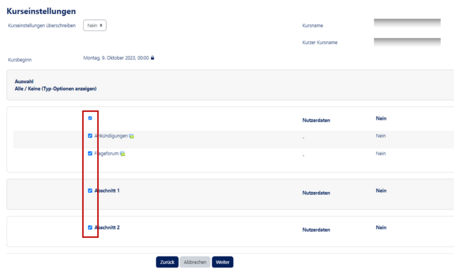
- In the next dialog you select all content (materials / activities) you want to restore. Here you can e.g. export only certain course topics or activities. By default all materials and activities are selected (1), so you restore the complete course. Then click on Next.
- Finally an overview with all settings will be displayed. If you want to change them again, click on Back. A click on Next starts the recovery process.
As soon as the course has been set up, you will be redirected to its homepage.
Why can't user data be restored or exported?[Bearbeiten | Quelltext bearbeiten]
User data is synchronized centrally via PAUL. Students are automatically added to the course depending on the settings, or they can enroll themselves in the course. There are currently no plans to import user data from other Moodle systems.
Video - Exporting and restoring content[Bearbeiten | Quelltext bearbeiten]
