Bitwarden - Passwoerter importieren/en
(Die Seite wurde neu angelegt: „{{translated page |origin=Bitwarden - Passwoerter importieren |lang=en |translated title=Bitwarden - Import Passwords }} Short Introduction == Summarized St…“) |
|||
| Zeile 4: | Zeile 4: | ||
|translated title=Bitwarden - Import Passwords | |translated title=Bitwarden - Import Passwords | ||
}} | }} | ||
| − | + | You can import passwords from other password managers into Bitwarden. Detailed instructions for various password managers can be found [https://bitwarden.com/de-de/help/import-data/ here] on the manufacturer's website. | |
| − | == | + | ==Step-by-Step Instructions== |
| − | + | This guide shows you how to import passwords from the KeePass password manager. | |
| − | + | <br> | |
| − | + | * Open KeePass and unlock your vault. | |
| − | + | * Select your vault. | |
| − | + | [[Datei:Bitwarden-import-01.png|left|mini|without|250px]] | |
| − | + | <br> | |
| + | * Click on '''"Files"''' in the menu bar. | ||
| + | * Click on '''"Export"'''. | ||
| − | === in | + | [[Datei:Bitwarden-import-02.png|links|mini|ohne|350px]] |
| − | + | <br> | |
| + | * Select '''"KeePass XML (2.x)"''' as the format. | ||
| + | * Click the floppy disk icon and choose a location to save the exported file. | ||
| + | * Choose a local location - Do not save this file to the cloud! | ||
| + | * Click '''"OK"''' to finish. | ||
| + | |||
| + | [[Datei:Bitwarden-import-03.png|links|mini|ohne|450px]] | ||
| + | <br> | ||
| + | * Enter your KeePass master password to unlock the vault. | ||
| + | |||
| + | <br clear=all> | ||
| + | |||
| + | <bootstrap_alert color=warning> | ||
| + | <span style='font-size:30px;'>⚠</span> | ||
| + | |||
| + | * You have now exported your passwords and saved them unencrypted. | ||
| + | * This file should be deleted after the import process! | ||
| + | |||
| + | </bootstrap_alert> | ||
| + | |||
| + | Open the Bitwarden [[Bitwarden - Anmeldung Weboberflaeche | Web Interface]] | ||
| + | |||
| + | # Click on '''"Tools"'''. | ||
| + | # Click on '''"Import"'''. | ||
| + | # Select a destination - In this example, the passwords will be saved in your own vault. | ||
| + | # Select '''"KeePass 2 (xml)"''' as the file format. | ||
| + | # Click on '''"Choose File"''' and select the file exported to KeePass. | ||
| + | |||
| + | * Click on '''"Import"''' to start the import process. | ||
| + | |||
| + | [[Datei:Bitwarden-import-04.png|links|mini|ohne|650px]] | ||
| + | |||
| + | <br clear=all> | ||
| + | |||
| + | [[Datei:Bitwarden-import-05.png|links|mini|ohne|450px]] | ||
| + | |||
| + | * Bitwarden will now display the number of login credentials that were successfully imported. | ||
| + | * If you have organized your passwords in KeePass into folders, the missing folders will be created automatically in KeePass – including subfolders. | ||
| + | * Not all KeePass features are available in Bitwarden. | ||
| + | |||
| + | <br clear=all> | ||
| + | |||
| + | <bootstrap_alert color=warning> | ||
| + | |||
| + | <span style='font-size:30px;'>⚠</span> | ||
| + | * After the successful import, delete your export file from KeePass. Even from the recycle bin! | ||
| + | * Passwords should not be stored unencrypted on the device! | ||
| + | |||
| + | </bootstrap_alert> | ||
== See also == | == See also == | ||
| − | + | ||
| + | * [[Passwortmanager]] | ||
Version vom 14. April 2026, 21:37 Uhr
Die deutsche Version finden Sie auf der Seite Bitwarden - Passwoerter importieren
You can import passwords from other password managers into Bitwarden. Detailed instructions for various password managers can be found here on the manufacturer's website.
Step-by-Step Instructions[Bearbeiten | Quelltext bearbeiten]
This guide shows you how to import passwords from the KeePass password manager.
- Open KeePass and unlock your vault.
- Select your vault.
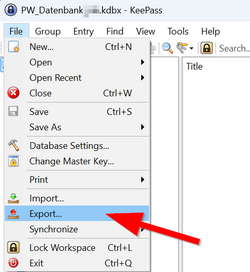
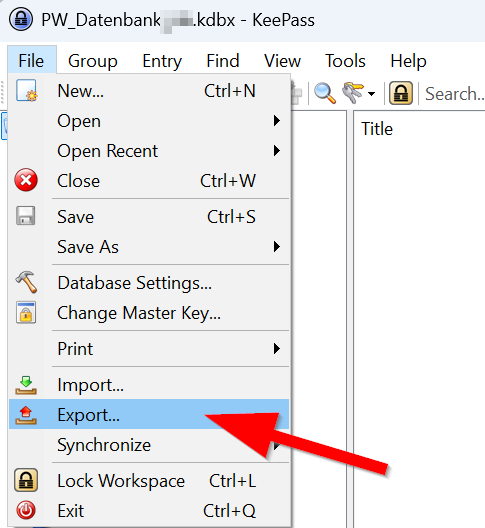
- Click on "Files" in the menu bar.
- Click on "Export".

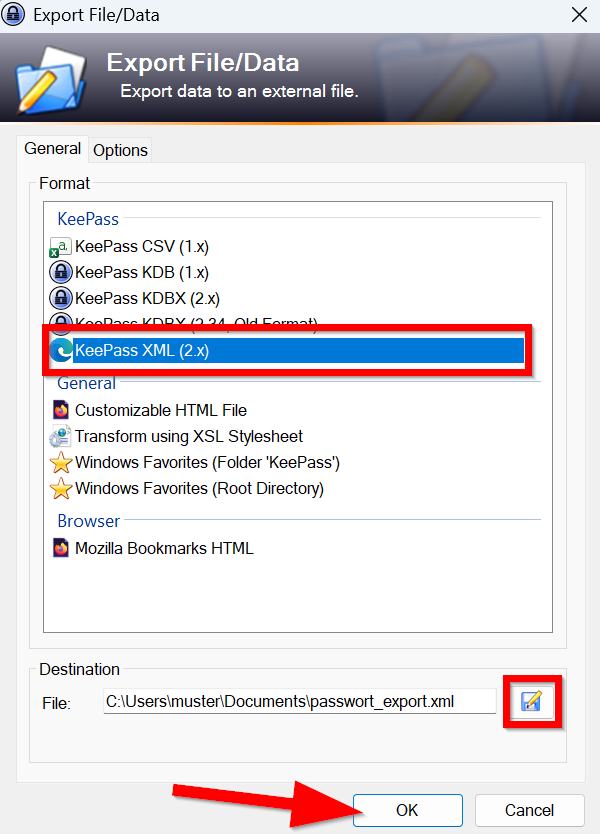
- Select "KeePass XML (2.x)" as the format.
- Click the floppy disk icon and choose a location to save the exported file.
- Choose a local location - Do not save this file to the cloud!
- Click "OK" to finish.
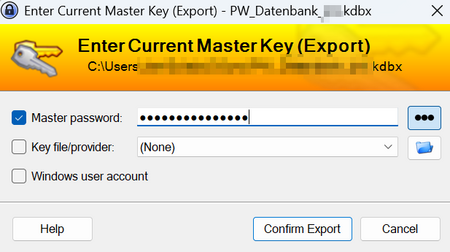
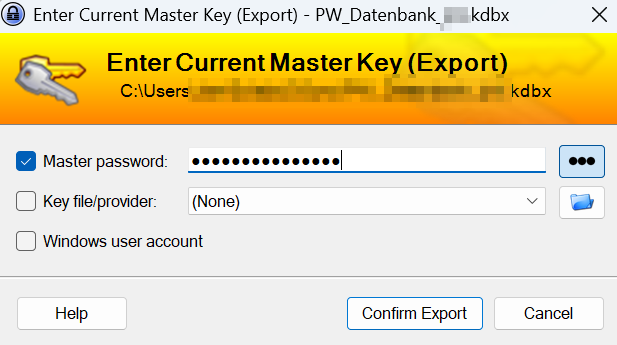
- Enter your KeePass master password to unlock the vault.
⚠
- You have now exported your passwords and saved them unencrypted.
- This file should be deleted after the import process!
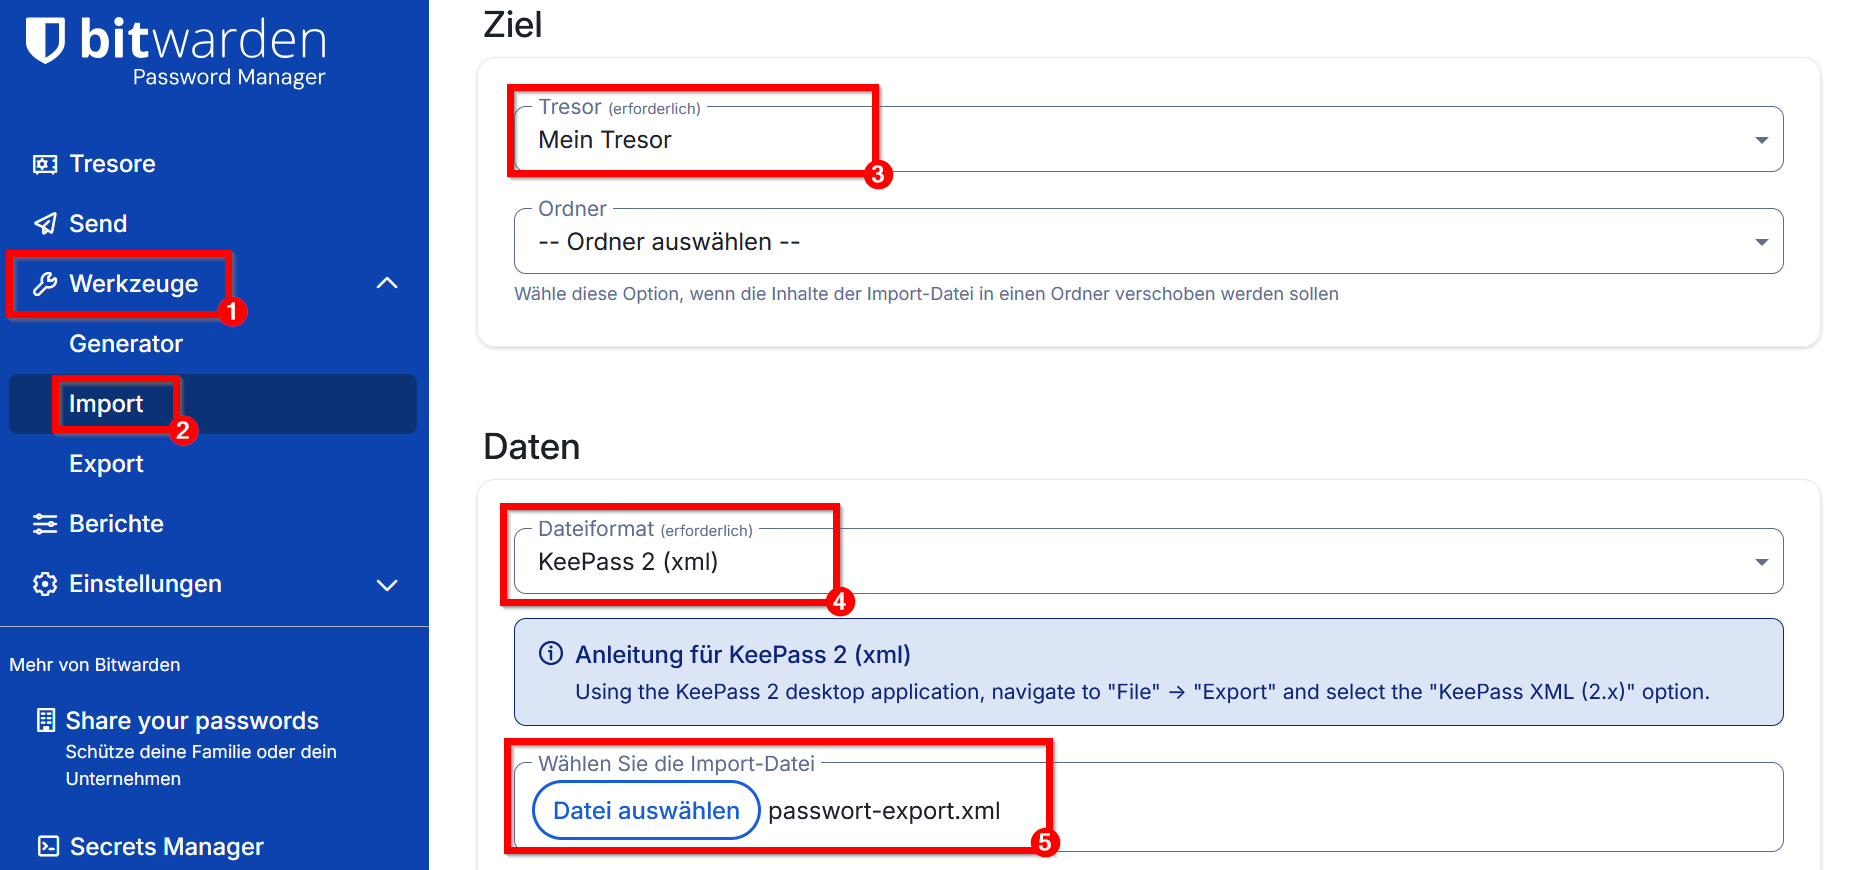
Open the Bitwarden Web Interface
- Click on "Tools".
- Click on "Import".
- Select a destination - In this example, the passwords will be saved in your own vault.
- Select "KeePass 2 (xml)" as the file format.
- Click on "Choose File" and select the file exported to KeePass.
- Click on "Import" to start the import process.

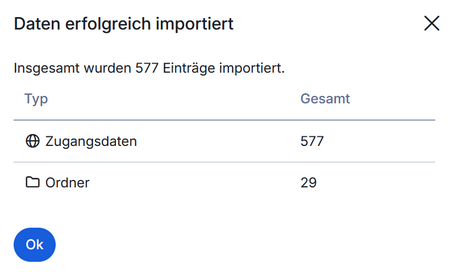
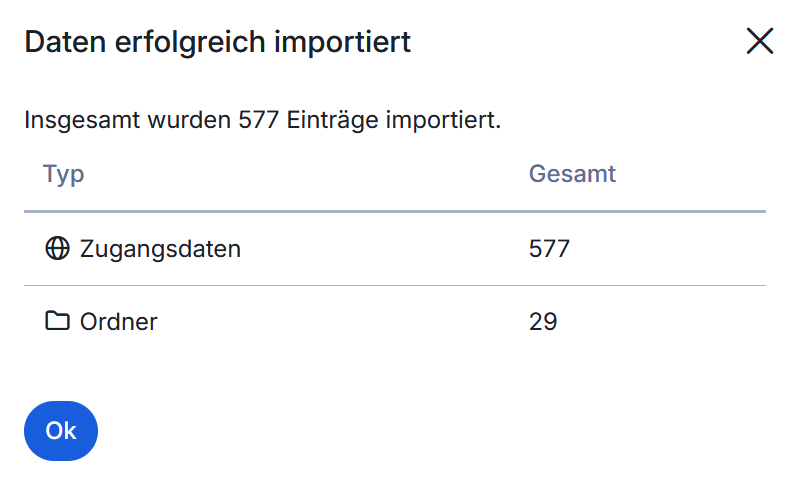
- Bitwarden will now display the number of login credentials that were successfully imported.
- If you have organized your passwords in KeePass into folders, the missing folders will be created automatically in KeePass – including subfolders.
- Not all KeePass features are available in Bitwarden.
⚠
- After the successful import, delete your export file from KeePass. Even from the recycle bin!
- Passwords should not be stored unencrypted on the device!