(Die Seite wurde neu angelegt: „{{translated page |origin=Datensicherung Backup mit Microsoft Software unter Windows |lang=en |translated title=Data storage: Backup with Microsoft software us…“) |
|||
| Zeile 4: | Zeile 4: | ||
|translated title=Data storage: Backup with Microsoft software using Windows | |translated title=Data storage: Backup with Microsoft software using Windows | ||
}} | }} | ||
| − | + | The Windows PC data backup offers the option of backing up a system image and/or your own PC data either to DVD or to a storage area provided by the ZIM. If you want to back up the data in the ZIM, you must apply for the storage area beforehand. | |
| − | == | + | ==Step-by-step instructions== |
| − | |||
| − | |||
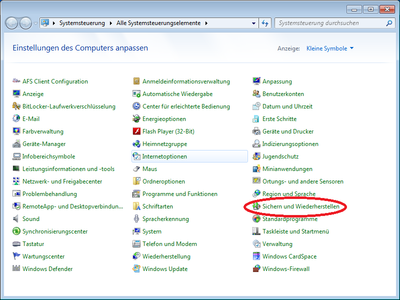
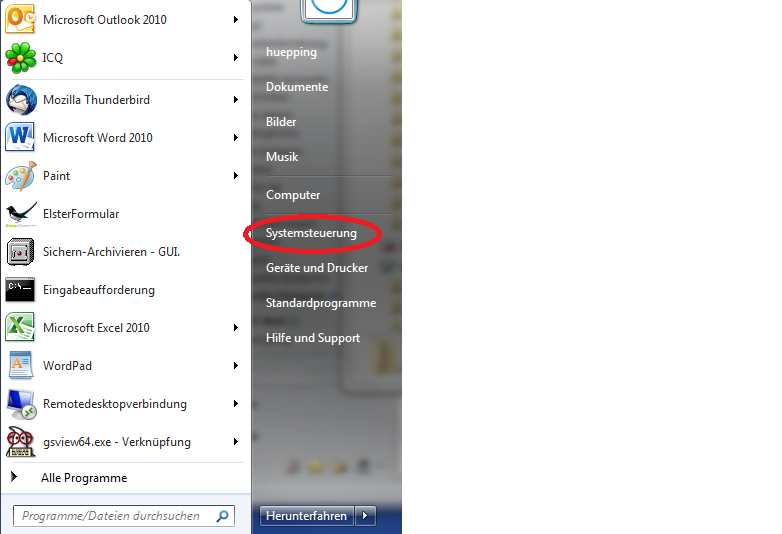
| − | + | The first step is to press the "Windows key" and open the Control Panel. | |
| − | + | ||
| + | [[Datei:screenshot_datensicherung_windows_pc_start.png|400px]] | ||
| + | |||
| + | |||
| + | |||
| + | |||
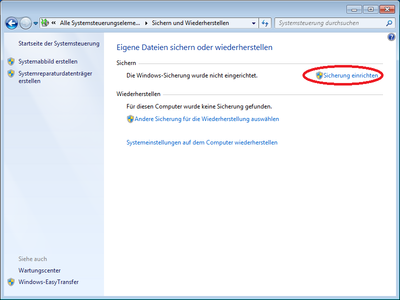
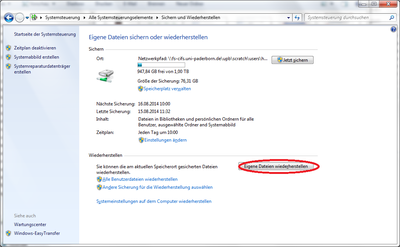
| + | Finally, click on Backup and Restore to make the necessary settings. | ||
| + | |||
| + | [[Datei:screenshot_datensicherung_windows_pc_start2.png|400px]] | ||
| + | |||
| + | Now click on Set backup. | ||
| + | |||
| + | [[Datei:screenshot_datensicherung_windows_pc_start3.png|400px]] | ||
| + | |||
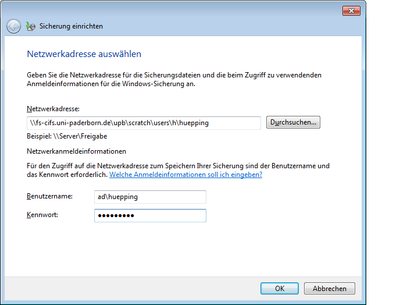
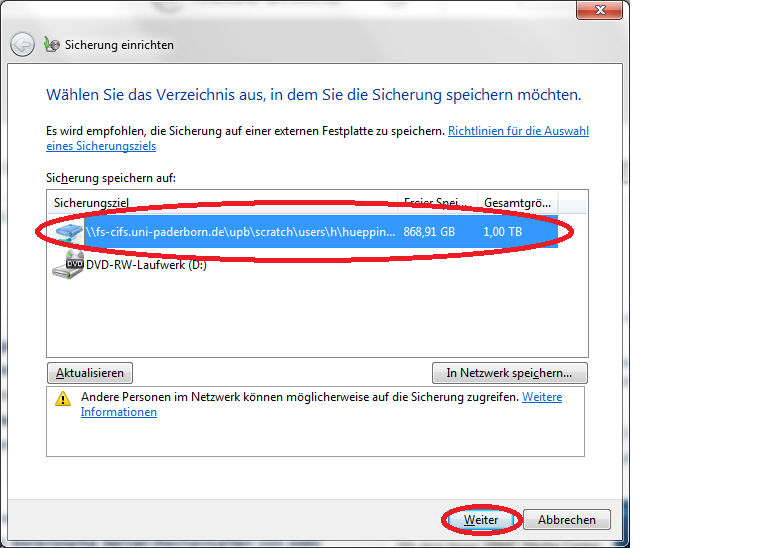
| + | To be able to back up the data to our [[Netzwerkspeicher|network storage]], you will here need to enter the network address for the desired path and authenticate yourself with your [[Uni-Account|uni account]]. | ||
| + | |||
| + | [[Datei:screenshot_datensicherung_windows_pc_start4.png|400px]] | ||
| + | |||
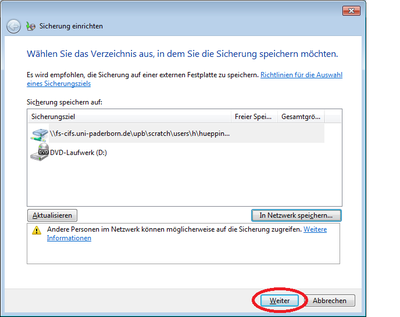
| + | Then confirm the set network address again with "Next". | ||
| + | |||
| + | [[Datei:screenshot_datensicherung_windows_pc_start5.png|400px]] | ||
| + | |||
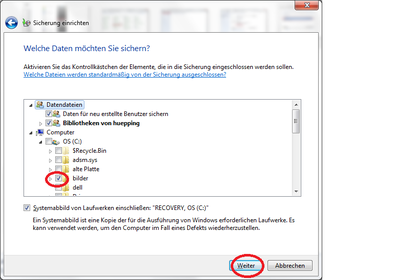
| + | Now select the data you want to back up. We recommend using the Windows setting. | ||
| + | |||
| + | [[Datei:screenshot_datensicherung_windows_pc_start6.png|400px]] | ||
| + | |||
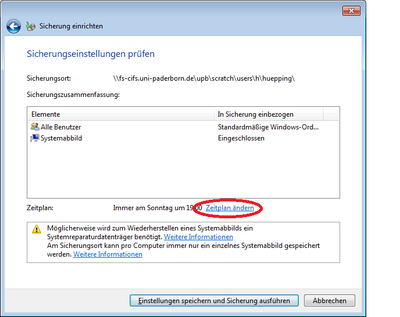
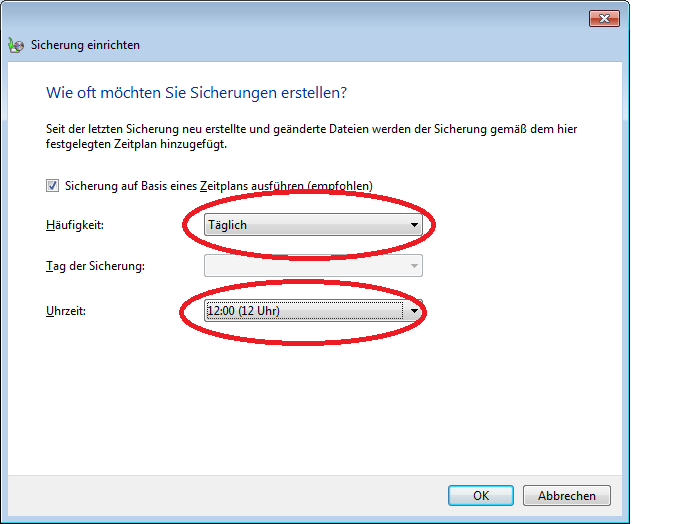
| + | Now change the schedule and adjust the backup times to your needs. | ||
| + | |||
| + | [[Datei:screenshot_datensicherung_windows_pc_start7.png|400px]] | ||
| + | |||
| + | [[Datei:screenshot_datensicherung_windows_pc_start8.png|400px]] | ||
| + | |||
| + | |||
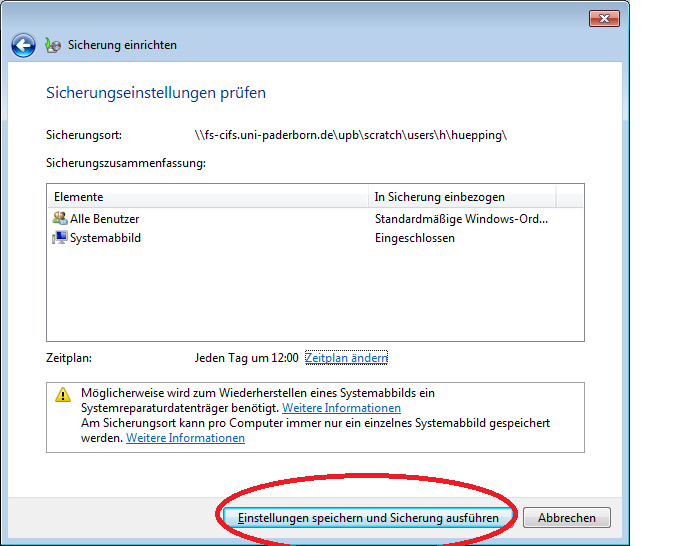
| + | Now save your settings. | ||
| + | |||
| + | [[Datei:screenshot_datensicherung_windows_pc_start9.png|400px]] | ||
| + | |||
| + | |||
| + | |||
| + | |||
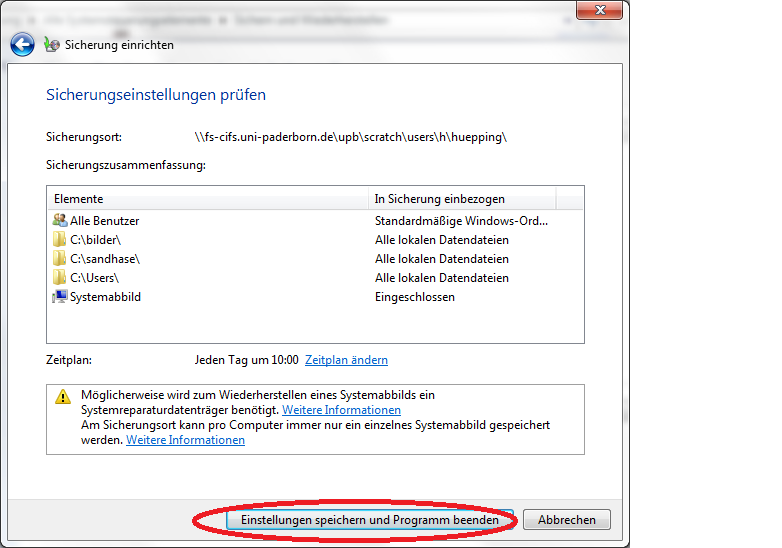
| + | From here you can perform the same backup as explained above with the difference that you select the data or individual folders to be backed up, e.g. only "Pictures". | ||
| + | |||
| + | |||
| + | [[Datei:screenshot_windows_datensicherung_20.png|400px]] | ||
| + | |||
| + | [[Datei:screenshot_windows_datensicherung_21.png|400px]] | ||
| + | |||
| + | [[Datei:screenshot_windows_backup_22.png|400px]] | ||
| + | |||
| + | [[Datei:screenshot_windows_datensicherung_23.png|400px]] | ||
| + | |||
| + | [[Datei:screenshot_windows_datensicherung_24.png|400px]] | ||
| + | |||
| + | |||
| + | [[Datei:screenshot_windows_datensicherung_30.png|400px]] | ||
| + | |||
| + | [[Datei:screenshot_windows_backup_31.png|400px]] | ||
| + | |||
| + | [[Datei:screenshot_windows_backup_32.png|400px]] | ||
| + | |||
| + | [[Datei:screenshot_windows_backup_33.png|400px]] | ||
| − | |||
| − | |||
| − | |||
| − | |||
== See also == | == See also == | ||
| − | + | * [[Datensicherung|Data Storage]] | |
Version vom 28. Juli 2024, 13:53 Uhr
The Windows PC data backup offers the option of backing up a system image and/or your own PC data either to DVD or to a storage area provided by the ZIM. If you want to back up the data in the ZIM, you must apply for the storage area beforehand.
Step-by-step instructions[Bearbeiten | Quelltext bearbeiten]
The first step is to press the "Windows key" and open the Control Panel.

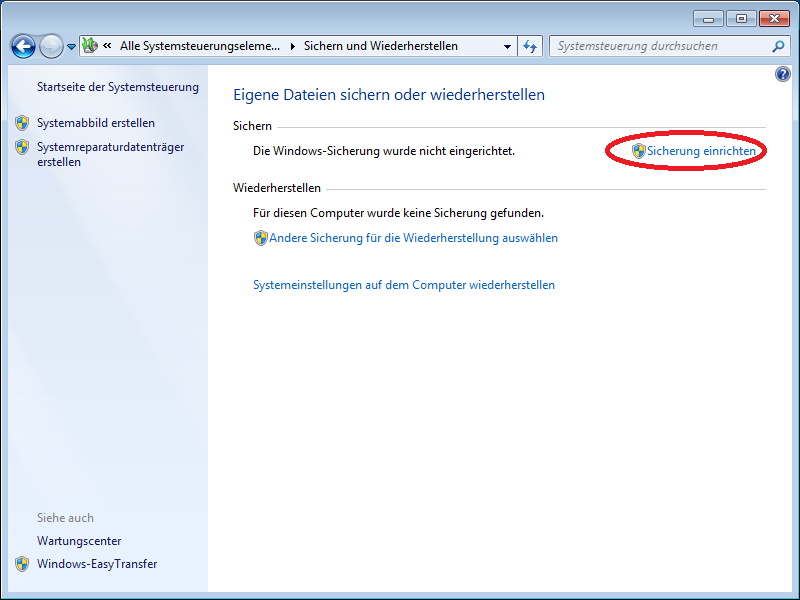
Finally, click on Backup and Restore to make the necessary settings.
Now click on Set backup.
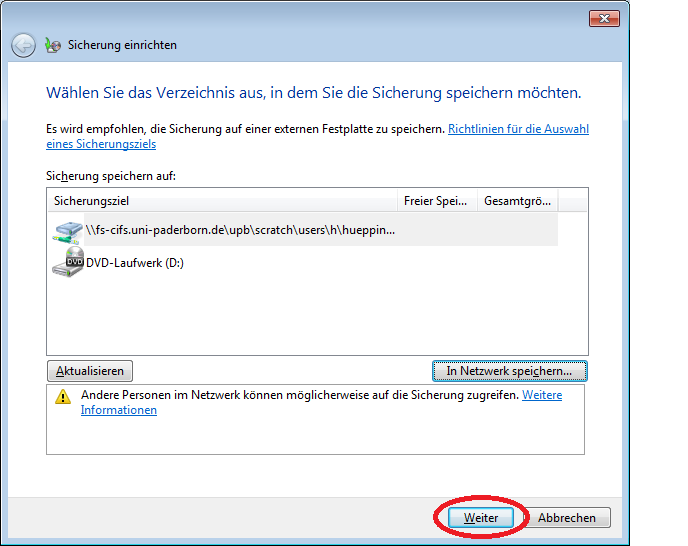
To be able to back up the data to our network storage, you will here need to enter the network address for the desired path and authenticate yourself with your uni account.
Then confirm the set network address again with "Next".
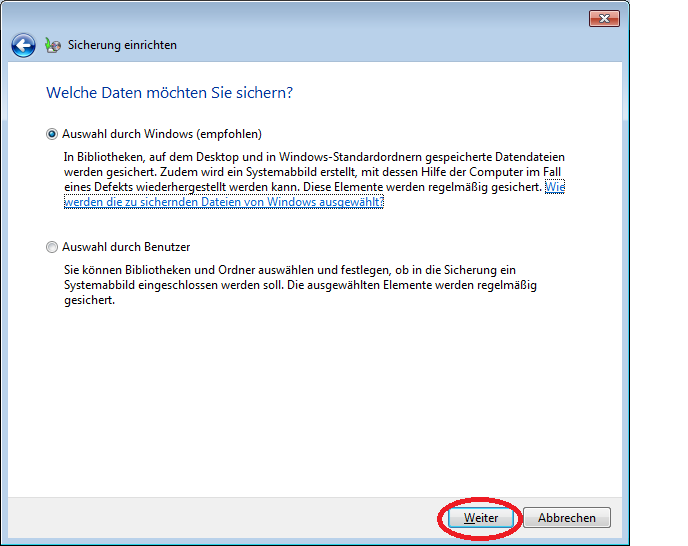
Now select the data you want to back up. We recommend using the Windows setting.

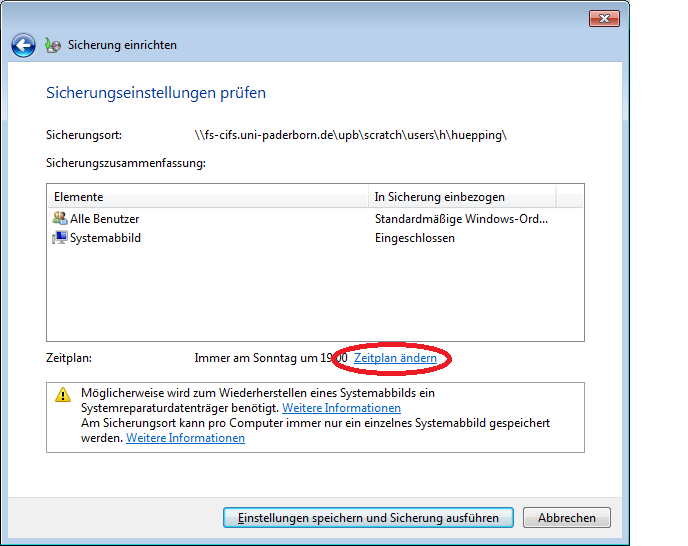
Now change the schedule and adjust the backup times to your needs.

Now save your settings.

From here you can perform the same backup as explained above with the difference that you select the data or individual folders to be backed up, e.g. only "Pictures".


