Jnk (Diskussion | Beiträge) K |
Jnk (Diskussion | Beiträge) K |
||
| Zeile 10: | Zeile 10: | ||
Under Linux, the CA certificate must be changed from 17 December 2025 onwards. You can find the procedure under [[#Download CA-Certificate]] | Under Linux, the CA certificate must be changed from 17 December 2025 onwards. You can find the procedure under [[#Download CA-Certificate]] | ||
</bootstrap_alert> | </bootstrap_alert> | ||
| − | <br> | + | <br><br> |
These instructions for setting up the eduroam WLAN at the University of Paderborn apply to devices with Linux via the user interface (GUI). As an example, the network is set up here under Ubuntu 14.04 LTS with Gnome Desktop. Depending on the Linux version, the settings may vary slightly. Please note that the Notebook Café does not offer immediate Linux support. | These instructions for setting up the eduroam WLAN at the University of Paderborn apply to devices with Linux via the user interface (GUI). As an example, the network is set up here under Ubuntu 14.04 LTS with Gnome Desktop. Depending on the Linux version, the settings may vary slightly. Please note that the Notebook Café does not offer immediate Linux support. | ||
Version vom 17. Dezember 2025, 10:11 Uhr
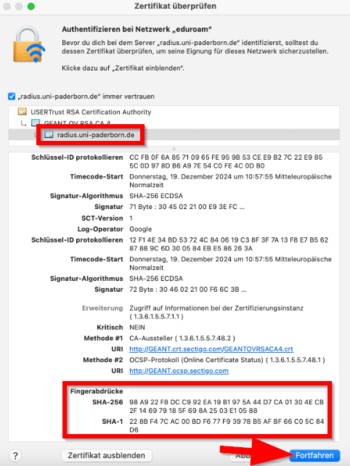
The RADIUS server certificate was replaced on 17 December 2025 at 8:00 a.m. After that, your device may prompt you to verify the certificate before trusting it. You can find the current fingerprint for the certificate here:
You do not need to replace any network certificates on your device. Most devices should still be able to connect to eduroam without any problems. More details on how individual devices will behave can be found here:
For details click here
Depending on the device, you may have to reconnect to eduroam, select the certificate again or trust the certificate.
macOS
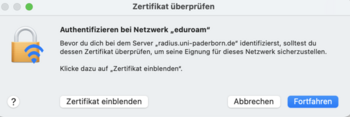
- Zertifikat einblenden to check certificate
- Continue to trust the certificate
- You may need to select your certificate again afterwards.
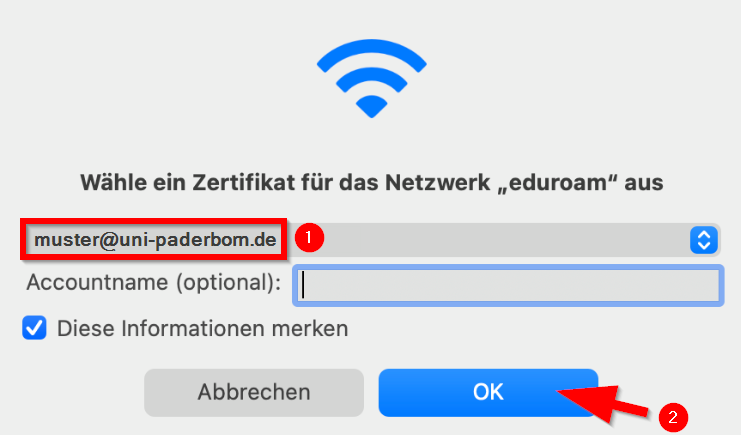
- Do not enter a username to log in to eduroam!

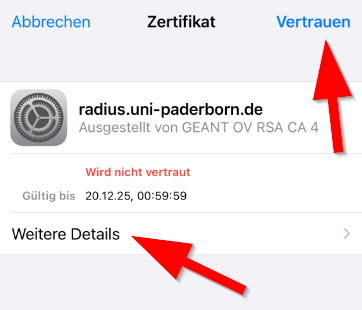
iPhone und iPad
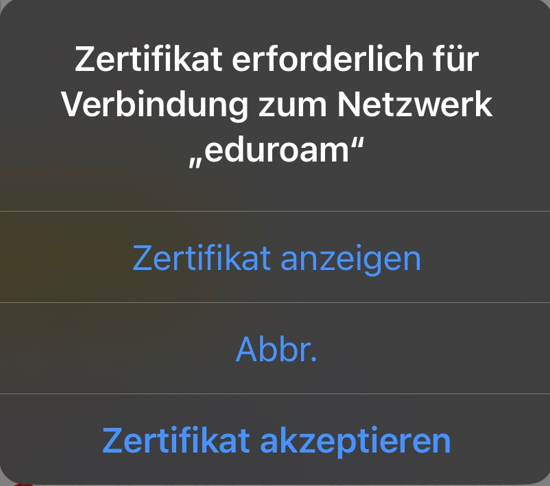
- Display certificate to check the certificate
- Accept certificate to trust the certificate

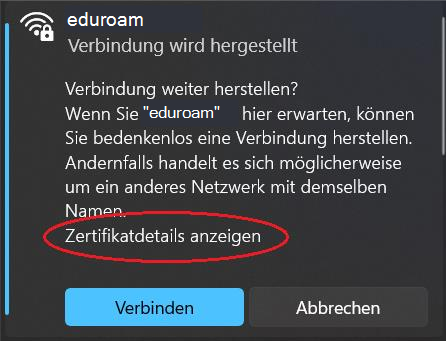
Windows
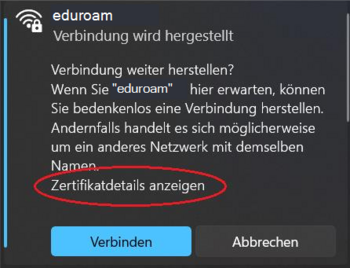
- Show certificate details to check the certificate
- Connect to trust the certificate
Under Linux, the CA certificate must be changed from 17 December 2025 onwards. You can find the procedure under #Download CA-Certificate
These instructions for setting up the eduroam WLAN at the University of Paderborn apply to devices with Linux via the user interface (GUI). As an example, the network is set up here under Ubuntu 14.04 LTS with Gnome Desktop. Depending on the Linux version, the settings may vary slightly. Please note that the Notebook Café does not offer immediate Linux support.
What to do?[Bearbeiten | Quelltext bearbeiten]
- Create your personal university network certificate
- <optional> Download the root certificate. This is a standard root certificate, so it should already exist.
- Set up the eduroam network.
- Delete any existing webauth profile so that the device automatically connects to eduroam.
- Special case: Depending on the Linux version, uni-paderborn.de must be entered under Domain/domain.
Step-by-step instructions[Bearbeiten | Quelltext bearbeiten]
Provide certificates[Bearbeiten | Quelltext bearbeiten]
Visit the Serviceportal an login with your Uni-Account.
Go to Netzwerkeinstellungen.
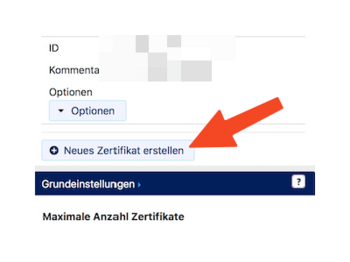
- Click "Neues Zertifikat erstellen".
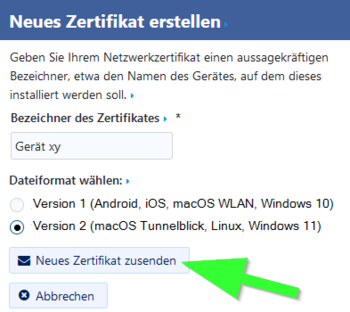
- Give the certificate a unique name (Ex: Laptop xy)
- Select Version 2 as the file format.
- Then click on "Neues Zertifikat zusenden".
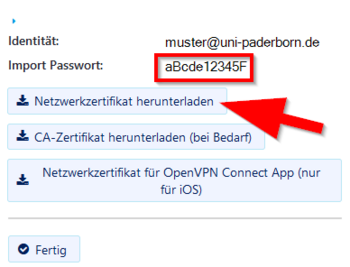
- A new network certificate has been created for you.
- First copy the Import Password to the clipboard.
- Now click on "Netzwerkzertifikat herunterladen".
Save the certificate e.g. B. in your user folder or another safe location. Do not delete/move this folder!
Download CA-Certificate[Bearbeiten | Quelltext bearbeiten]
Download the current CA certificate. To do this, right-click on the following link and save the certificate. Depending on your browser, this may look different:
- Firefox: “'Save target as...”'
- Chrome, Edge, Brave: “'Save link as...”'
https://repo.harica.gr/certs/HARICA-TLS-Root-2021-RSA.pem
- Then save the CA certificate in the same folder as the network certificate.
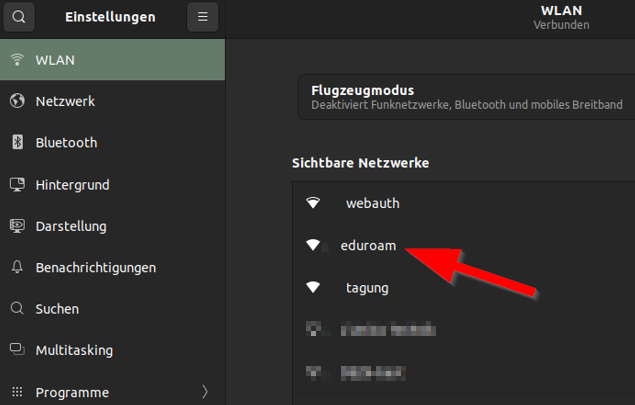
Set up Eduroam[Bearbeiten | Quelltext bearbeiten]

- Open the status menu.
- Select "WLAN-Netzwerke auswählen".

- Choose eduroam.
Set up eduroam as follows:

- Security: WPA & WPA2 Enterprise
- Legitimation: TLS
- Identity: <username>@uni-paderborn.de (replace <username> with your university account
- Domain (if available): radius.uni-paderborn.de
- CA Certificate: Select the CA-Certificate (HARICA-TLS-Root-2021-RSA.pem)
- Password CA certificate: Remains blank.
- User certificate: Select your personal network certificate (the file that ends in .p12 and contains your university account username).
- User certificate password: Remains blank.
- Secret user key: Is usually automatically filled with "User certificate" - otherwise insert it yourself
- User key password: Import password for your personal network certificate.
- <variable> domain:
- uni-paderborn.de (Some Linux versions require this entry)
- radius.uni-paderborn.de (or this one)
- <leave blank> (or something like that, if it shows at all)
Troubleshooting[Bearbeiten | Quelltext bearbeiten]
Add manually[Bearbeiten | Quelltext bearbeiten]
You may also be able to add the eduroam network manually:
- Connection name: Can be freely selected
- SSID: eduroam
- See above for remaining settings.
Ubuntu[Bearbeiten | Quelltext bearbeiten]
Some customers report problems setting up eduroam on Ubuntu 22.04 and newer. The problem is described here:
| Attention: The following solution suggestion comes from a customer. Use at your own risk. There was no examination by the ZIM. |
1) Find wpa_supplicant service file with `systemctl status wpa_supplicant`.
    For me, the path is "/lib/systemd/system/wpa_supplicant.service"
2) In that file, (with superuser rights), add the line
    `Environment="OPENSSL_CONF=/usr/lib/ssl/openssl.cnf"`
3) Backup old config:
    `sudo cp /usr/lib/ssl/openssl.cnf /usr/lib/ssl/openssl.cnf.backup`
4) Modify "openssl.cnf" like follows:
    a) Below "[openssl_init]" add the line "ssl_conf = ssl_sect".
    b) At the end of the file, add
      [ssl_sect]
      system_default = system_default_sect

      [system_default_sect]
      Options = UnsafeLegacyRenegotiation
      CipherString = DEFAULT:@SECLEVEL=1
5) Restart the service `sudo systemctl restart wpa_supplicant.service`.
    If that doesn't work, reboot.
Linux Mint[Bearbeiten | Quelltext bearbeiten]
On Linux Mint it can happen that the user certificate cannot be selected when selecting it in the network settings. Linux Mint does not recognize the file extension/format .p12 in the selection.
Solution:[Bearbeiten | Quelltext bearbeiten]
Convert user certificate from P12 to PEM format
openssl pkcs12 -in Network_Certificate_UNIACCOUNTNAME_XXXX.p12 -out Network_Certificate_UNIACCOUNTNAME_XXXX.pem -nodes
After the conversion you can continue as described.


