Jnk (Diskussion | Beiträge) |
Jnk (Diskussion | Beiträge) |
||
| Zeile 5: | Zeile 5: | ||
}} | }} | ||
| − | {{ | + | {{Fingerprint Radiuszertifikat-en}} |
This tutorial describes how to set up the Wi-Fi eduroam on '''Chrome OS'''. | This tutorial describes how to set up the Wi-Fi eduroam on '''Chrome OS'''. | ||
Version vom 16. Januar 2025, 11:22 Uhr
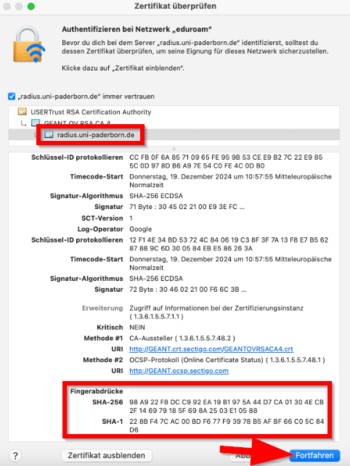
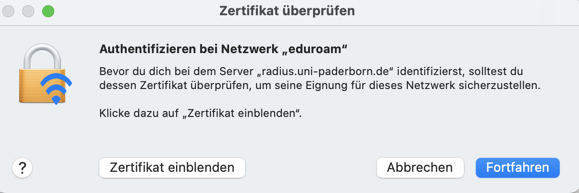
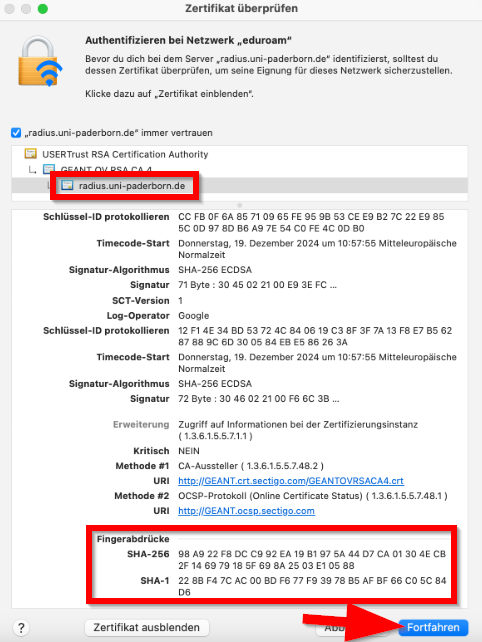
The RADIUS server certificate was replaced on 17 December 2025 at 8:00 a.m. After that, your device may prompt you to verify the certificate before trusting it. You can find the current fingerprint for the certificate here:
You do not need to replace any network certificates on your device. Most devices should still be able to connect to eduroam without any problems. More details on how individual devices will behave can be found here:
For details click here
Depending on the device, you may have to reconnect to eduroam, select the certificate again or trust the certificate.
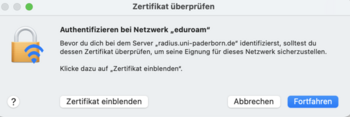
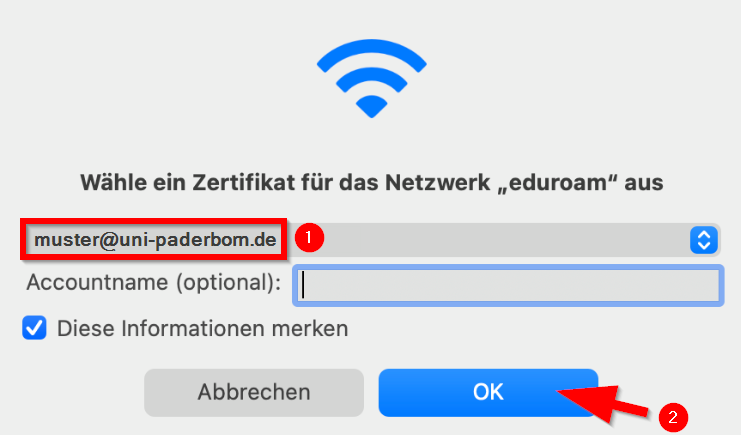
macOS
- Zertifikat einblenden to check certificate
- Continue to trust the certificate
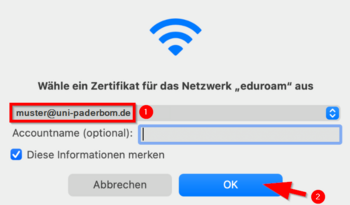
- You may need to select your certificate again afterwards.
- Do not enter a username to log in to eduroam!
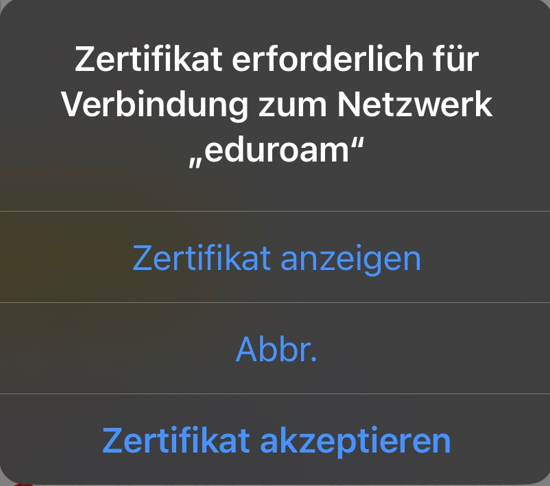
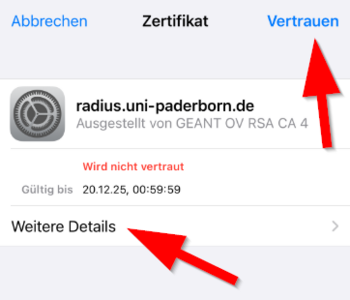
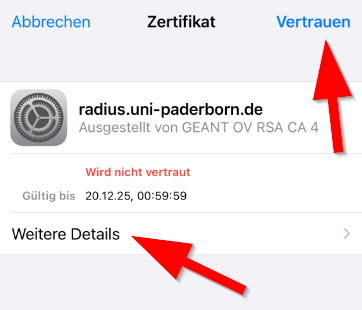
iPhone und iPad
- Display certificate to check the certificate
- Accept certificate to trust the certificate
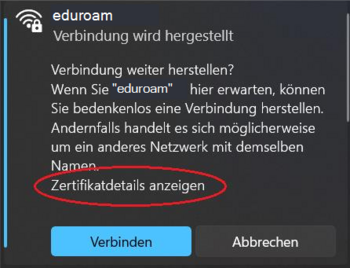
Windows
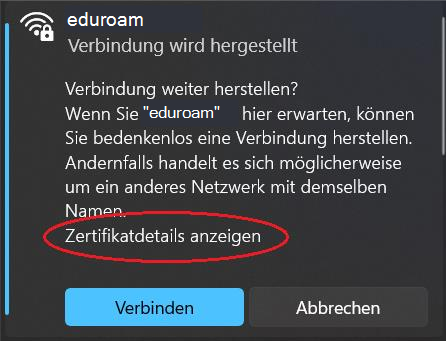
- Show certificate details to check the certificate
- Connect to trust the certificate
This tutorial describes how to set up the Wi-Fi eduroam on Chrome OS.
This manual was tested on Google Peppy (45.0.2454.98 (64-Bit). Other versions of Chrome OS may look different.
What needs to be done?[Bearbeiten | Quelltext bearbeiten]
- Install certificates
- Set up eduroam
Step-by-step instructions[Bearbeiten | Quelltext bearbeiten]
Install certificates[Bearbeiten | Quelltext bearbeiten]
- Open the Serviceportal via Chrome Browser or a similar browser.
- Log in with your university account.
- Visit Benutzerverwaltung and click on Netzwerk Einstellungen.
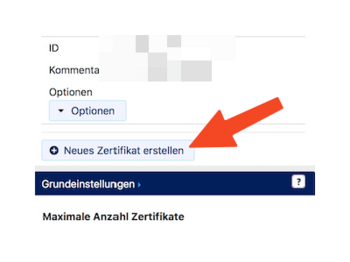
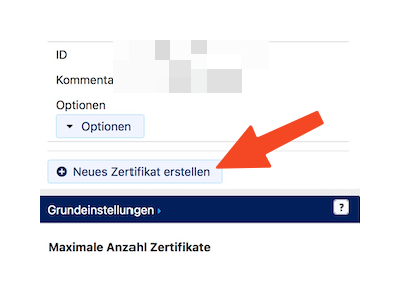
- Click on Neues Zertifikat erstellen.
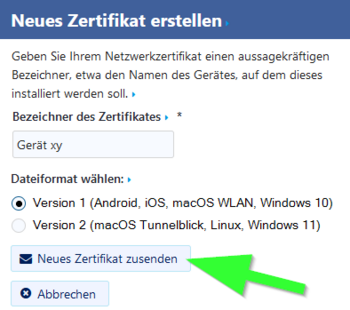
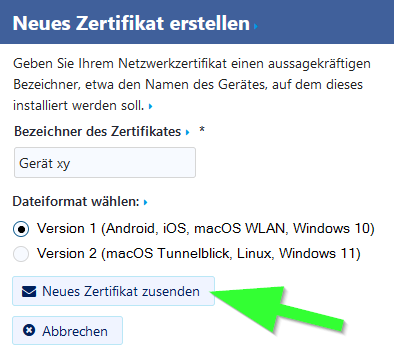
- Give the certificate an identifier like "Chromebook".
- Choose 'Version 1' as the data format.
- Click on Neues Zertifikat zusenden
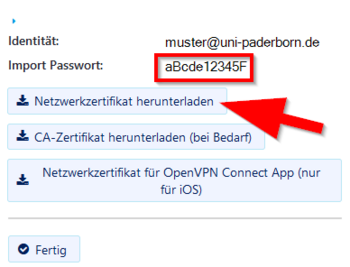
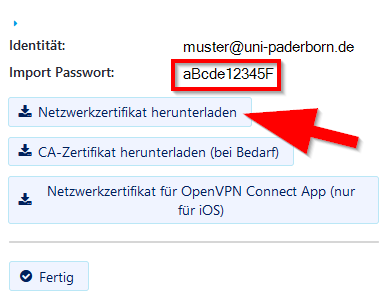
- Copy the import password.
- Click on Netzwerkzertifikat herunterladen.
- Click on CA-Zertifikat herunterladen.
After downloading, we need to install the certificates.
Use the main search option on Chrome OS and type:
chrome://settings/certificates
Install user certificate[Bearbeiten | Quelltext bearbeiten]
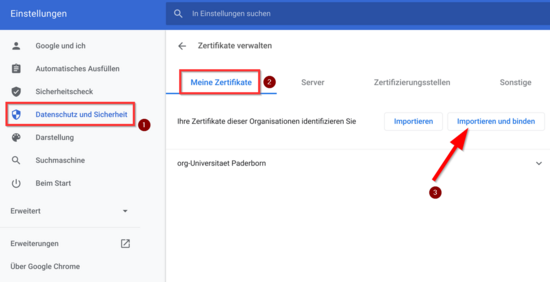
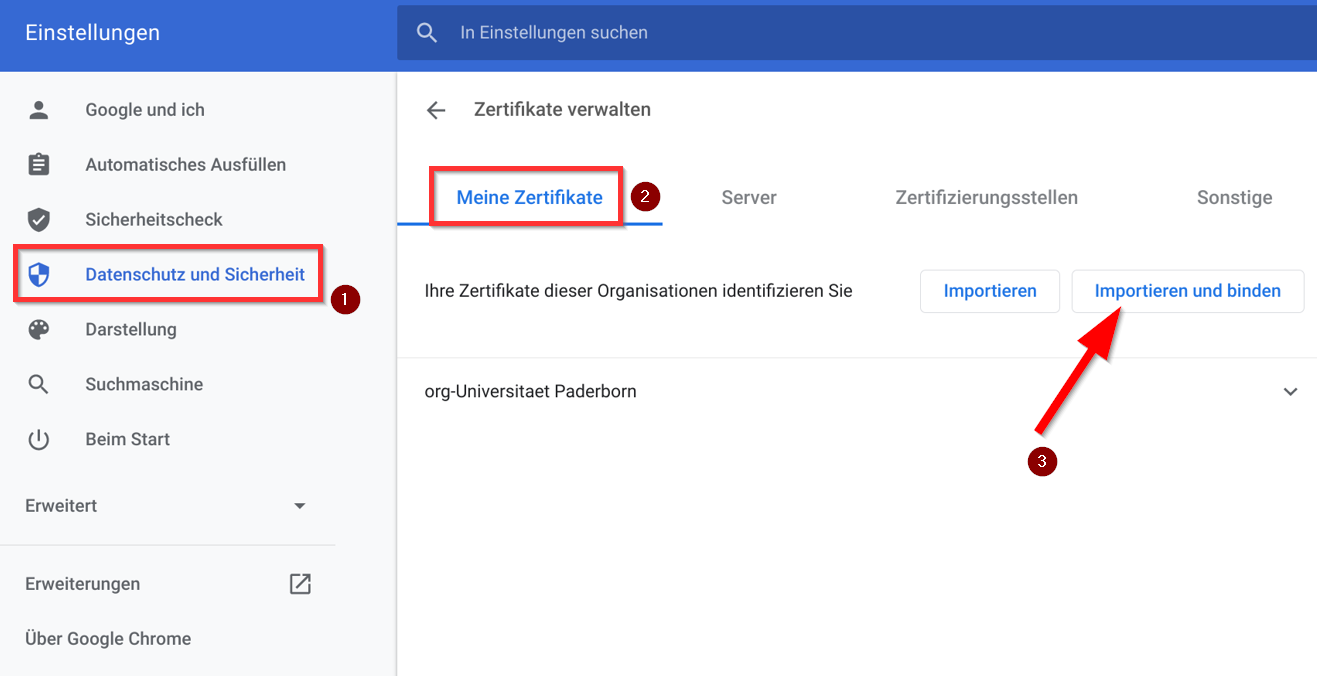
- Go to 'Datenschutz und Sicherheit' on the left side.
- Select 'Meine Zertifikate'.
- Click 'Importieren und binden'.
- Select the user certificate "Network_Certificate_<username>_******.p12".
- Use the import password to install the certificate.
Install CA certificate[Bearbeiten | Quelltext bearbeiten]
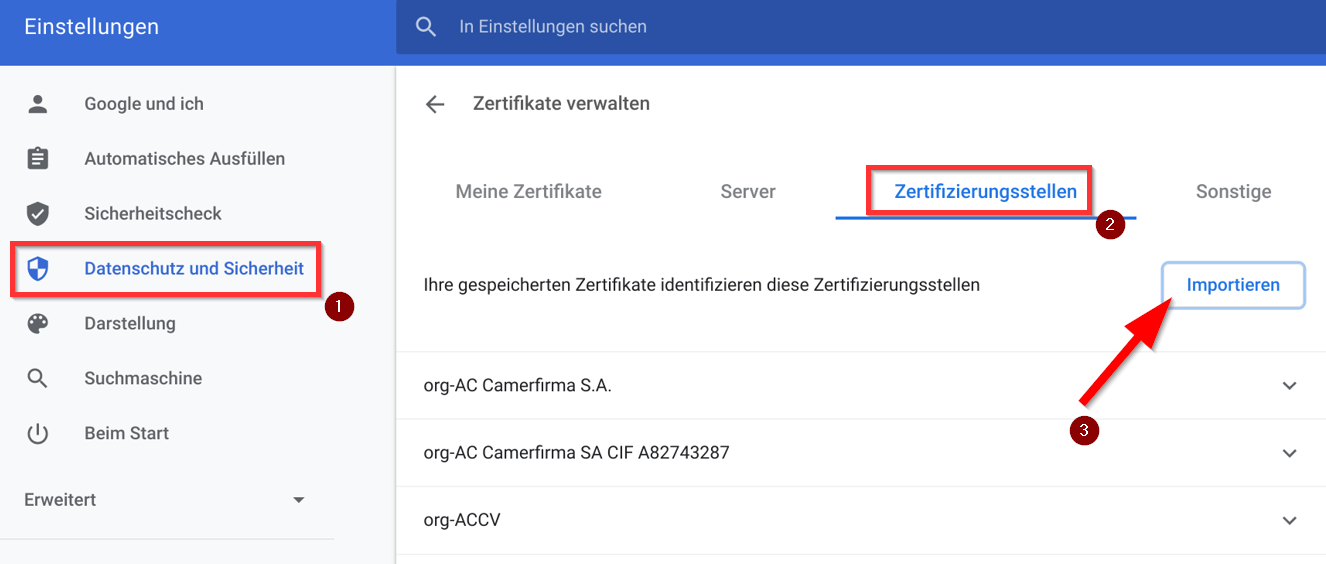
- Go to 'Datenschutz und Sicherheit' on the left side.
- Select 'Zertifizierungsstellen'.
- Click 'Importieren'.
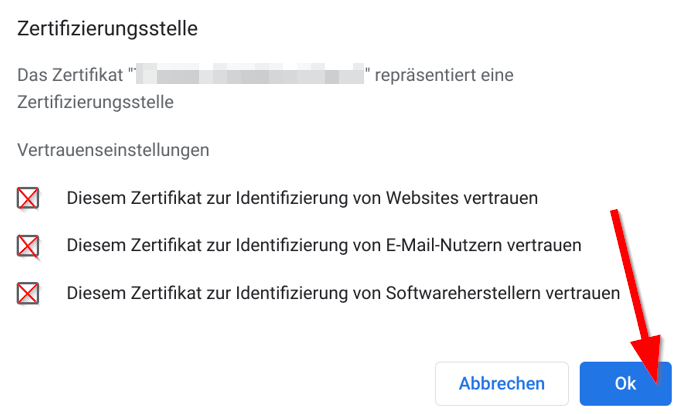
Open the certificate "USERTrustRSACertificationAuthority.crt"
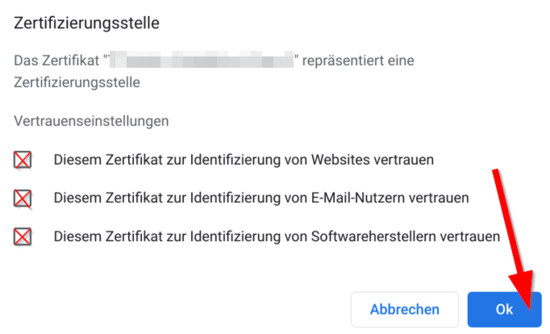
- Enable the three suggested options.
- Then click '"Ok".
Setting up Eduroam[Bearbeiten | Quelltext bearbeiten]
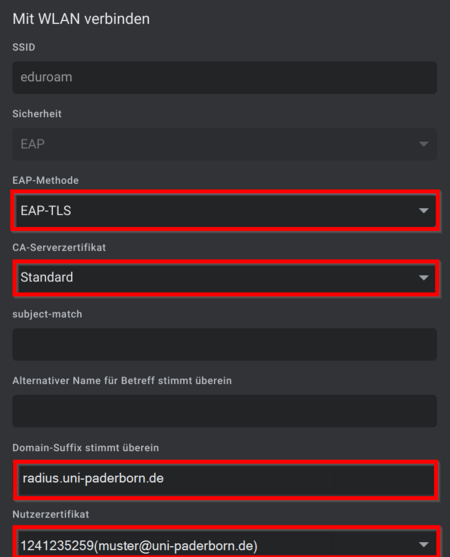
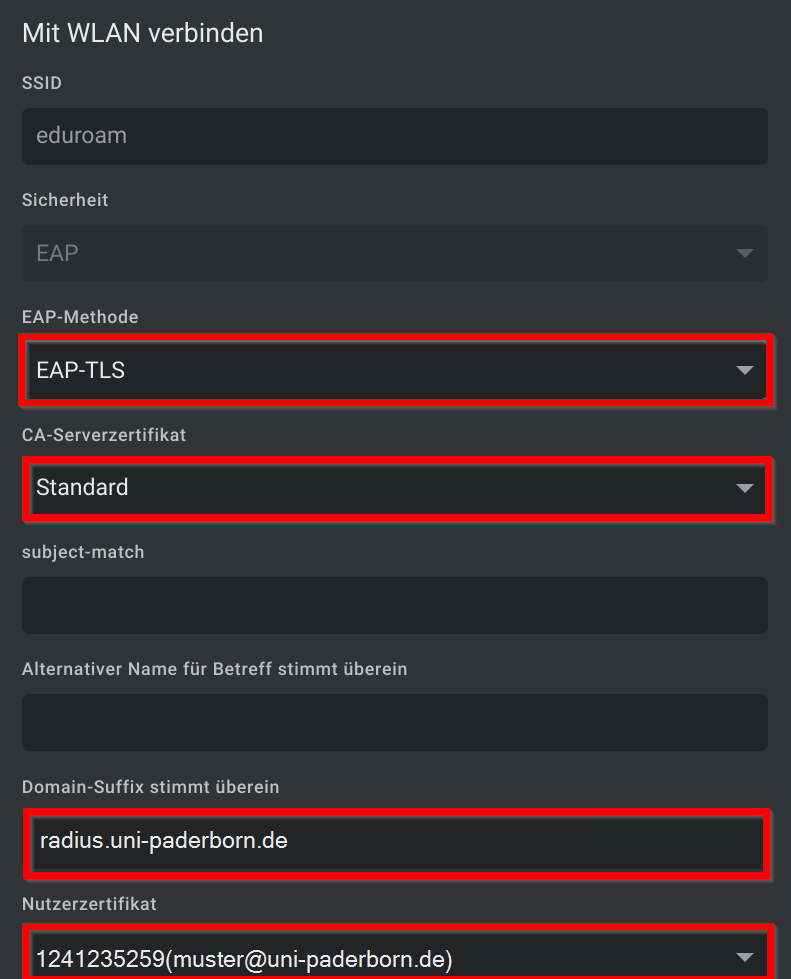
Click on the WLAN symbol in the taskbar and select eduroam. Select the following settings.
- EAP method: EAP-TLS
- CA server certificate: Standard
- Domain suffix: radius.uni-paderborn.de
- User certificate: Select the user certificate. The name may vary
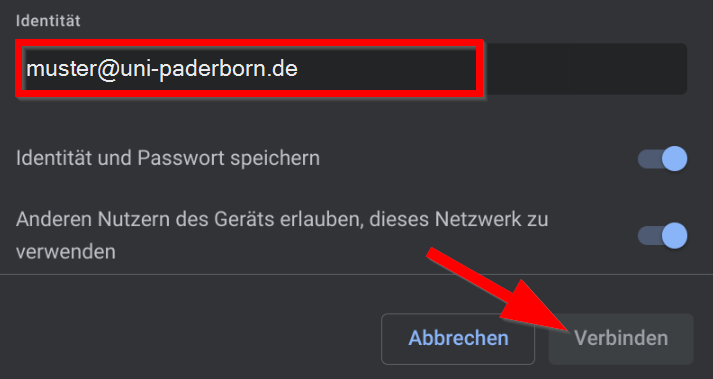
- Identität: <username>@uni-paderborn.de - Replace <username> with your personal username for the university account.
- Then click on 'Connect
From now on, your device should automatically connect to "eduroam" on campus.
Remove the network "WebAuth" from known networks. From now on you should only connect to "eduroam".
