You can put topics and materials into a course beforehand without the students being able to see them immediately. In this article we will discuss how to make content available at a later date.
Visibility control[Bearbeiten | Quelltext bearbeiten]
Hide contents[Bearbeiten | Quelltext bearbeiten]
The simplest release is the manual version. You set the contents as hidden and activate them if you want to. You can do this for entire topics or for individual materials and activities.
Requirements[Bearbeiten | Quelltext bearbeiten]
For materials and activities, you can also set detailed visibility requirements. You do this using the setting item Prerequisites.
States[Bearbeiten | Quelltext bearbeiten]
PANDA distinguishes between two states of content visibility.
Hidden contents are not visible. For the students, it looks as if these contents are not present in PANDA. They select this setting with the "crossed out eye icon".
If the content is grayed out, a message is displayed indicating that content is available. However, these cannot yet be used. You select this setting with the "eye icon". For example, deposited material cannot yet be downloaded. A test cannot yet be opened in this variant.
Variants[Bearbeiten | Quelltext bearbeiten]
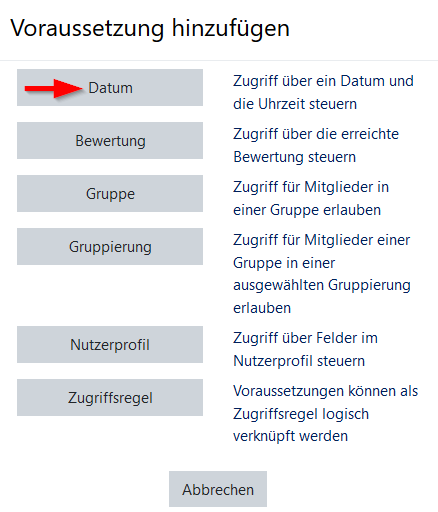
The following requirements are available:
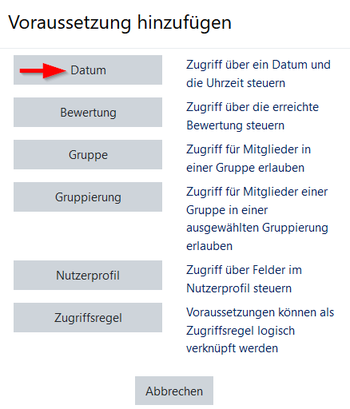
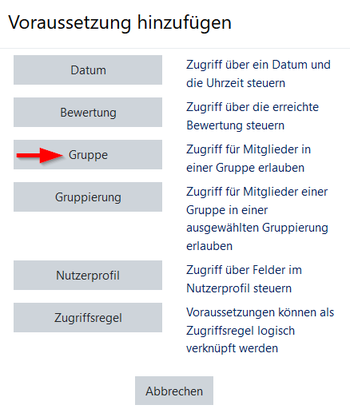
Date
Your content will be activated on a certain date.
Evaluation
Link the availability of the content to a rating for a test.
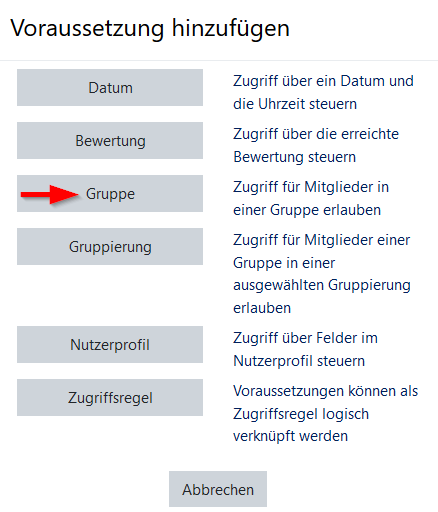
Group
Make content available only to members of a specific group. This is suitable, for example, for group work or presentations in which you only want to make material available to students that matches the topic of the group to which they are assigned.
Grouping
User profile
Link the availability of content to information from the user profile
Access rule
Examples[Bearbeiten | Quelltext bearbeiten]
Hide subjects[Bearbeiten | Quelltext bearbeiten]
Scenario
We want to create a new topic, but the participants cannot see it yet.
Instructions
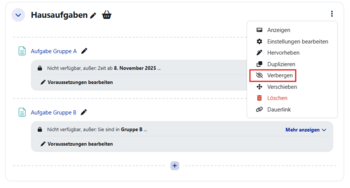
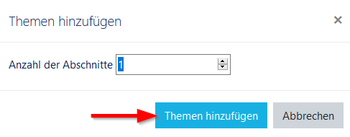
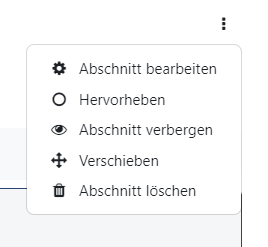
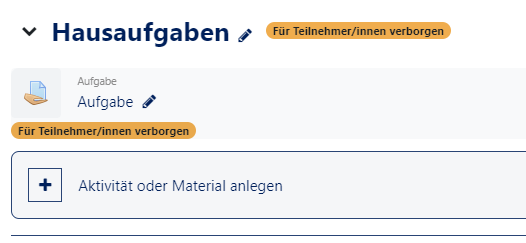
Create a new theme and name it as you wish. We use the term "homework" as an example. Now click on "Edit" and then on "Hide topic".
Result
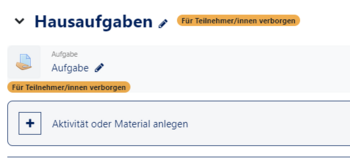
Participants of the course will not be shown this topic now. Lecturers and assistants can see the topic. They can add a note to the topic.
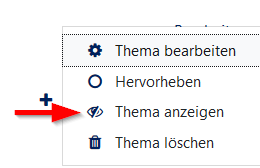
If you want to show the topic again, click on "Edit" and then on "Show topic".
You can also proceed in the same way with individual materials and activities. To do this, choose the "Edit" link of the respective elements.
Hide contents[Bearbeiten | Quelltext bearbeiten]
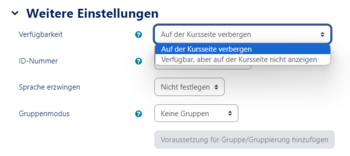
If you want to hide materials or activities, you can set this directly when you create them.
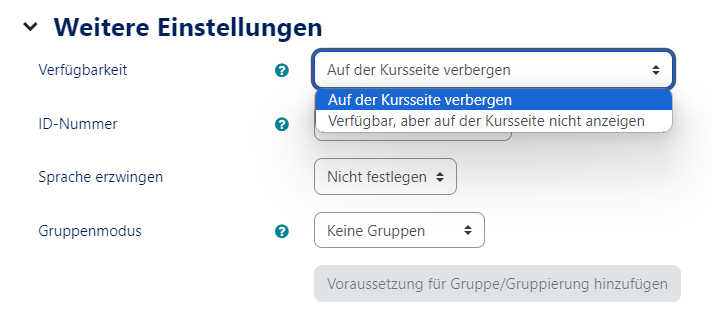
Expand the item "Further setting" and change the default setting to "Hidden for students".
[Bearbeiten | Quelltext bearbeiten]
Scenario
In an already created topic "Homework" documents with exercises should be made available. However, the participants should not be able to see the material until a certain date.
Instructions
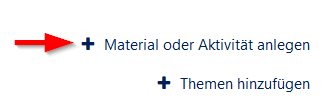
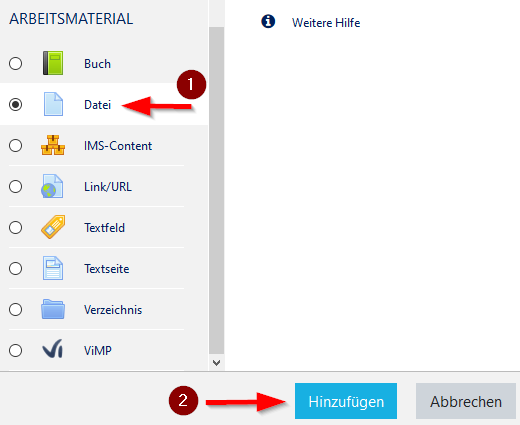
Click on "Create material or activity".
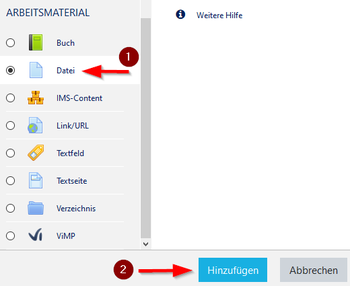
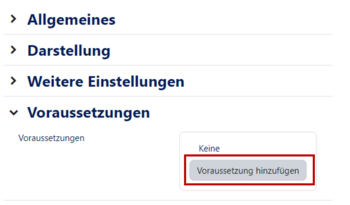
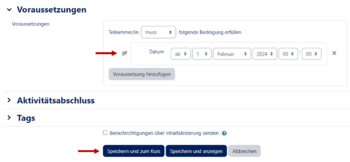
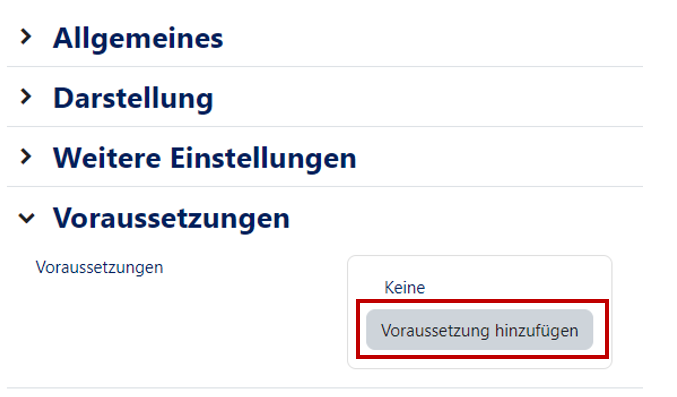
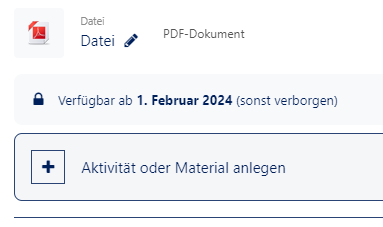
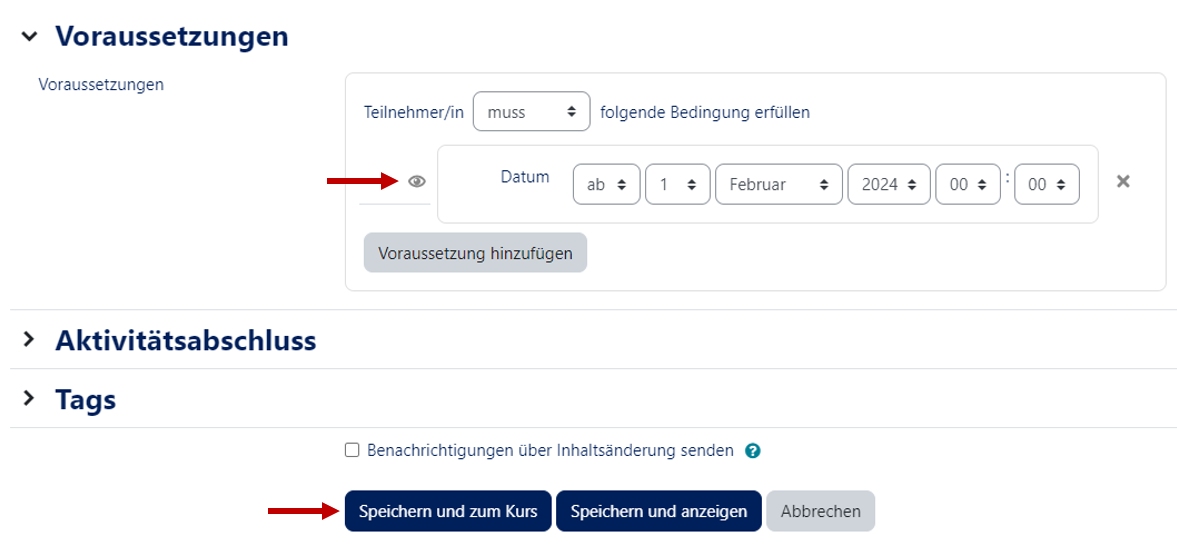
Add a new file. Under "General" you can upload and name the file as usual. Then we change to the section "Requirements" and add a new requirement "Date" there.
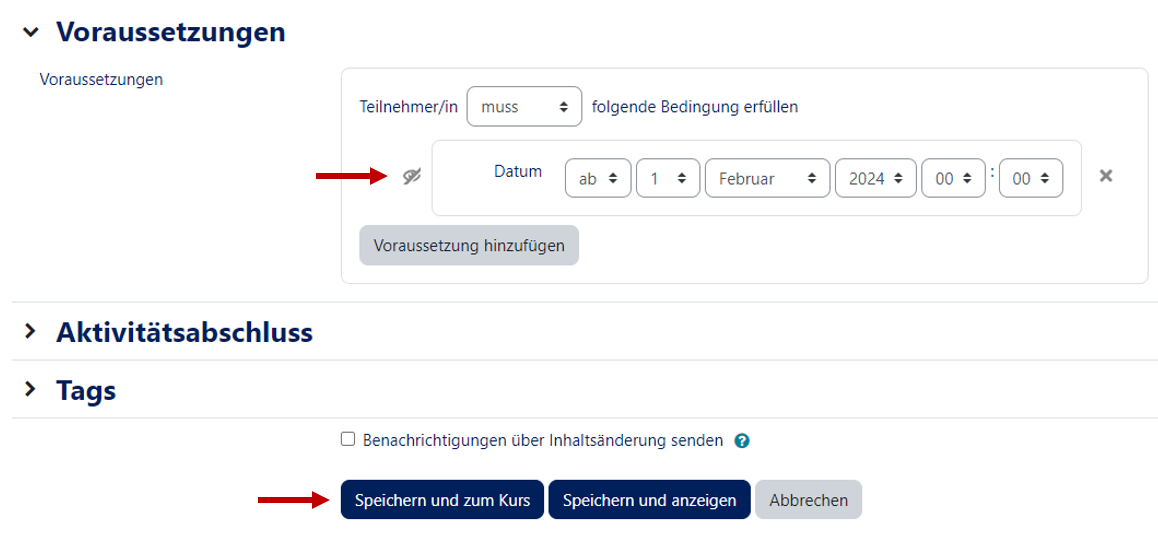
As state we choose the "crossed out eye symbol". This means that participants cannot see the set material. Then we choose the time from which the material should be available for the participants.
Result
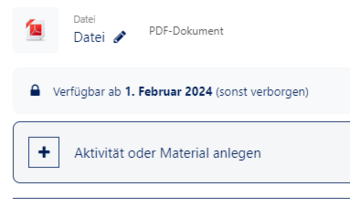
lecturers and assistants, the material is now displayed with a corresponding note. Participants cannot see the material until the selected date.
Release by date (grayed out)[Bearbeiten | Quelltext bearbeiten]
Scenario
In an already created topic "Homework" documents with exercises should be made available. The participants should only have access to the material after a certain point in time. However, they should be able to see beforehand which material will be released when.
Instructions
Click on "Create material or activity".
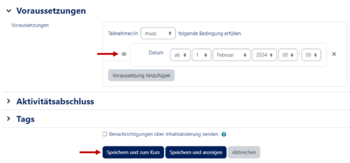
Add a new file. Under "General" you can upload and name the file as usual. Then we change to the section "Requirements" and add a new requirement "Date" there.
As state we choose the "eye symbol". This means that participants can already see that material exists. But they have no access to it. Then we choose the point in time when the material should be available for the participants.
Result
The material is already visible to the participants before the selected date. However, they can only download it from the selected date. In the view for the participants the file is therefore slightly greyed out.
Release for groups[Bearbeiten | Quelltext bearbeiten]
Scenario
We want to add a new topic "Presentations" and set up working materials for individual groups. Each group should only see the materials that are intended for that particular group.
It's assumed
A course already exists. The participants are already divided into groups in the course.
Instructions
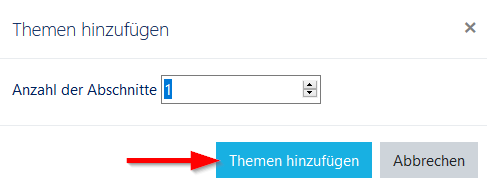
Activate editing for the course and create a new topic.
Rename the topic as desired. As an example we choose "presentations" here. Then click on "Create material or activity".
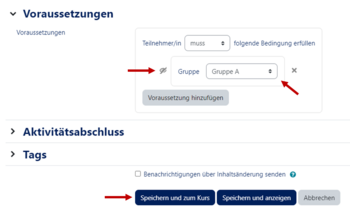
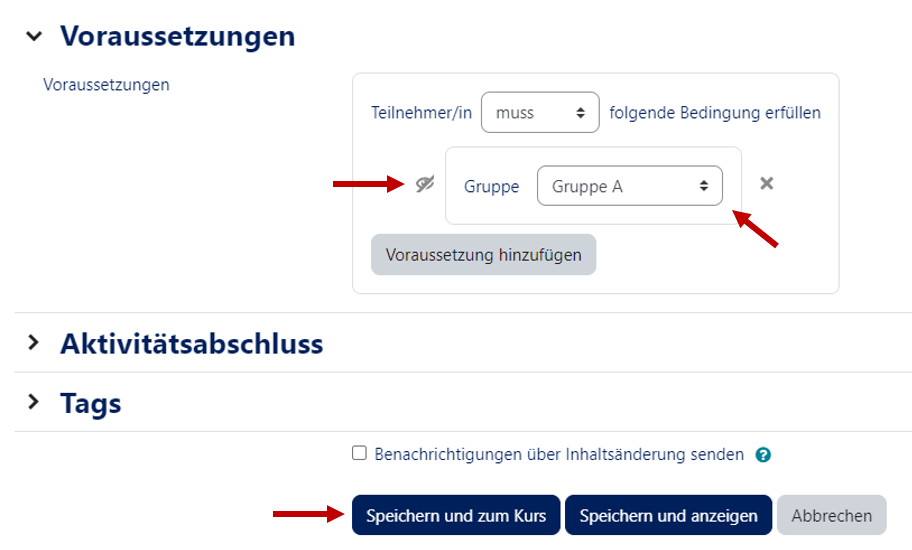
Add a new file. Under "General" you can upload and name the file as usual. Then we change to the section "Requirements" and add a new requirement "Group" there.
We choose the crossed-out eye as the state. The material will then only be visible to those participants who meet the requirements. As group we choose one of our predefined groups. Here this is "Topic 1".
Proceed in the same way with the material for other groups and select the appropriate prerequisite at this point. In this example we repeat this for material for another group "Topic 2".
Result
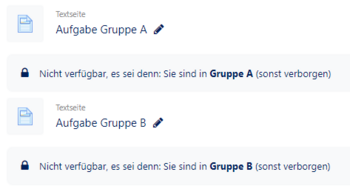
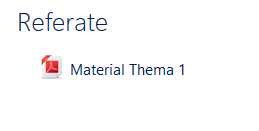
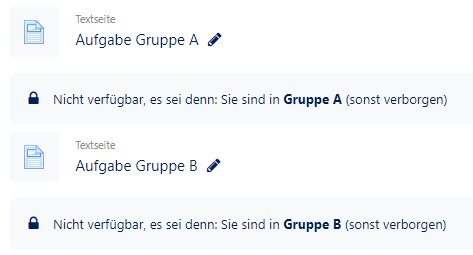
We have now set two different materials, but they are only visible to the respective group. As a lecturer or assistant you will see all materials. For the students, however, the view looks completely different. They only see the material that is intended for their group.
Release after evaluation[Bearbeiten | Quelltext bearbeiten]
Scenario
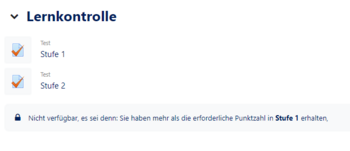
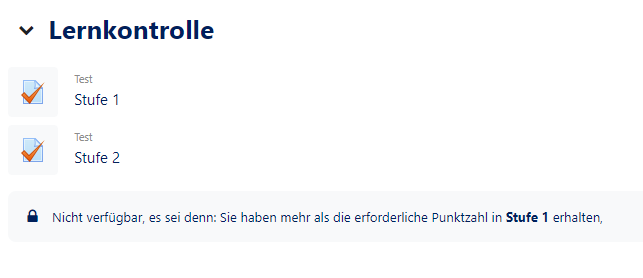
We want to offer the participants a staggered test as a learning control. Participants should not be able to start at the advanced level until the previous test has been completed with a certain number of points.
It is assumed
A theme entitled "Learning Control" has already been created. A test with the title "Level 1" has also already been created.
Instructions
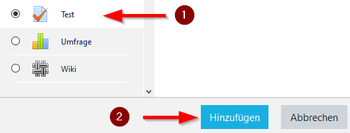
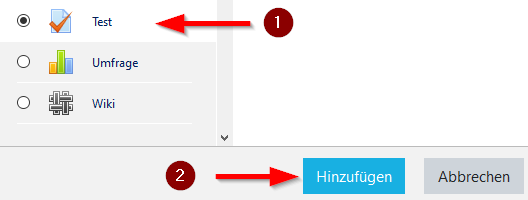
Click on "+ Create material or activity". Select "Test" and then click on "Add". We name this test "Level 2".
In this manual, we will not go into the basic creation of tests any further. You can find instructions for creating tests here.
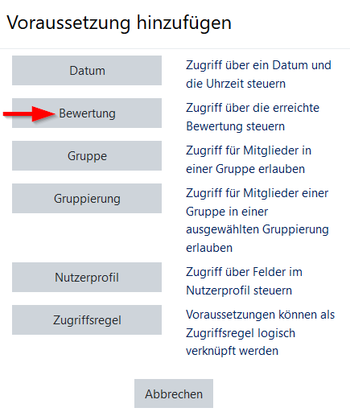
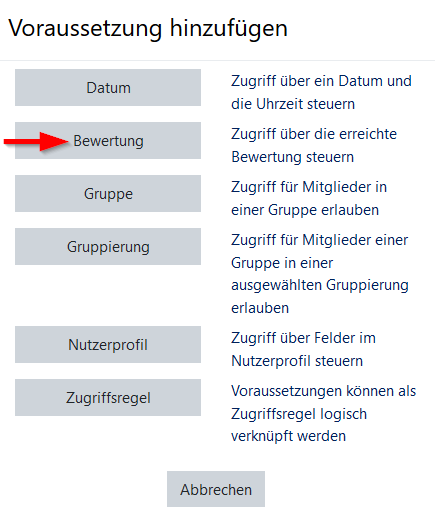
Open the "Requirements" section. Click on "Add prerequisite" and then select "Rating".
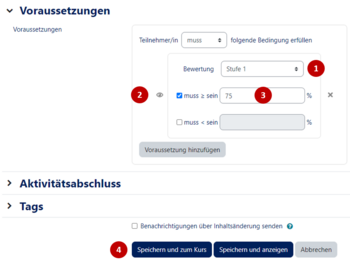
We select "Level 1" in the Rating field. This links our test "Level 2" with the evaluation of the test "Level 1". As state we choose the "eye symbol". With this, participants can already see that a test "Level 2" exists, even if they have not yet taken the test "Level 1".
Note: The students can only see that the element exists. They cannot open the test yet. If you do not want the test to be displayed before you open it, select the "crossed-out eye icon".
In the box next to it (3) we enter the necessary evaluation in percent that participants must have achieved in the "Level 1" test in order to gain access to the "Level 2" test. As an example, we use a prerequisite of 75%. Now we finish the setup with "Save and go to course".
Result
We have now created a two-step test. Participants can only start with level 2 when they have achieved a score of 75% in the "Level 1" test.

